Setting up the GitLab and Jira DVCS connector
Objective
Understand the mechanics behind the GitLab and Jira connector and how to set it up.
How to set the connector up
Please read this article for a refresher on how you can connect Jira Software to compatible development tools like GitLab.
How the connector works
Connecting Jira and GitLab
GitLab support is now an officially supported DVCS account type with support for both the polling and non-polling webhooks.
API usage
When calling the GitLab API, we use keyset pagination set to a page size of 100 by default. The page size can be changed via a system property which at the time of writing has to be between 20 - 100.
1dvcs.connector.gitlab.page.sizeOAuth 2
We will be using the OAuth 2 library in new versions of Jira (also backported to 8.5). This will get around the limited OAuth 2 functionality available in the GitHub implementation, and use a standard feature across Jira and other Atlassian products.
GitLab Cloud
In order for GitLab Cloud to accept the OAuth 2 connection, you must set a system property.
1atlassian.oauth2.client.add.empty.user.agent.for.token.requestsGitLab OAuth 2 setup
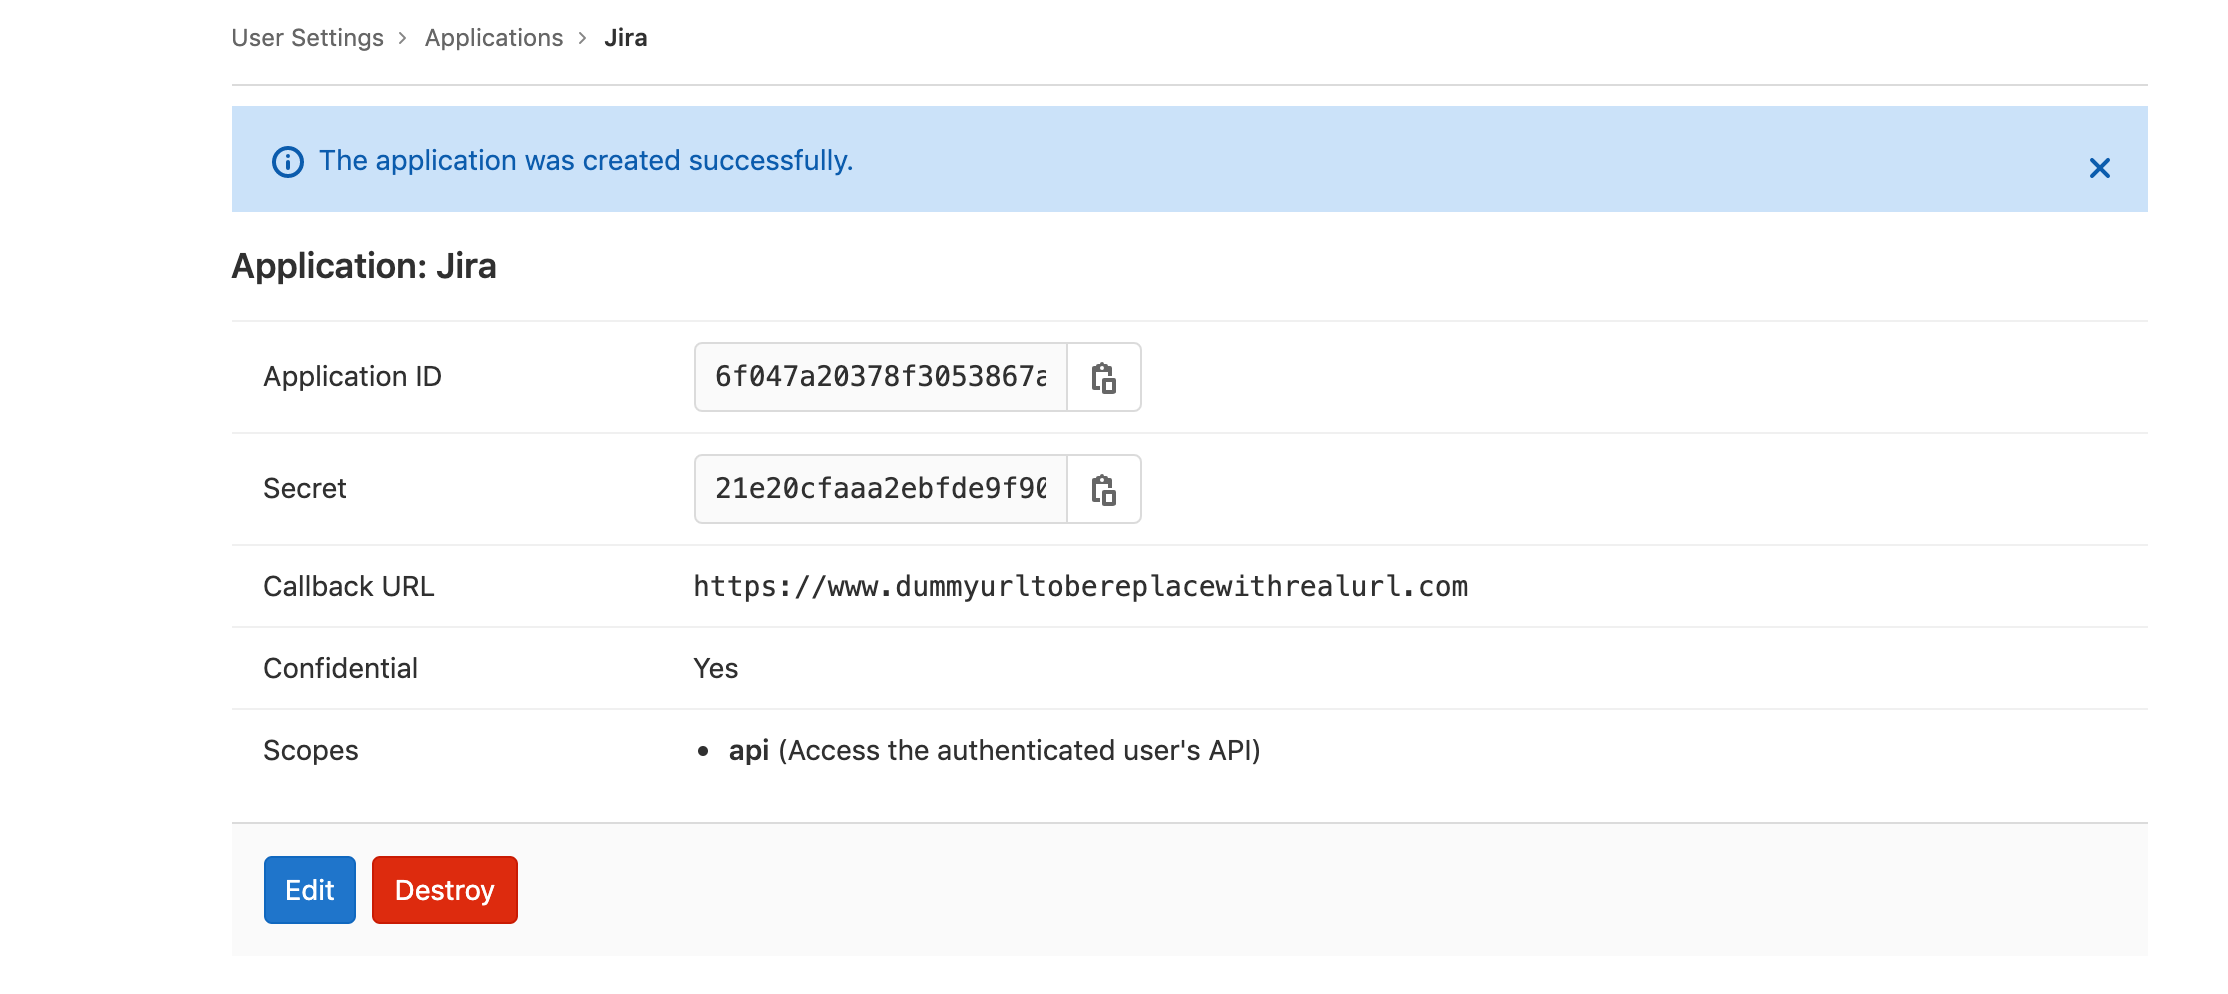
This will require the creation of OAuth credentials on the GitLab side, which is supported by both the cloud and enterprise versions. The API scope is required for the DVCS connection to work. When creating this, add a dummy URL in the redirect URI to be replaced later.
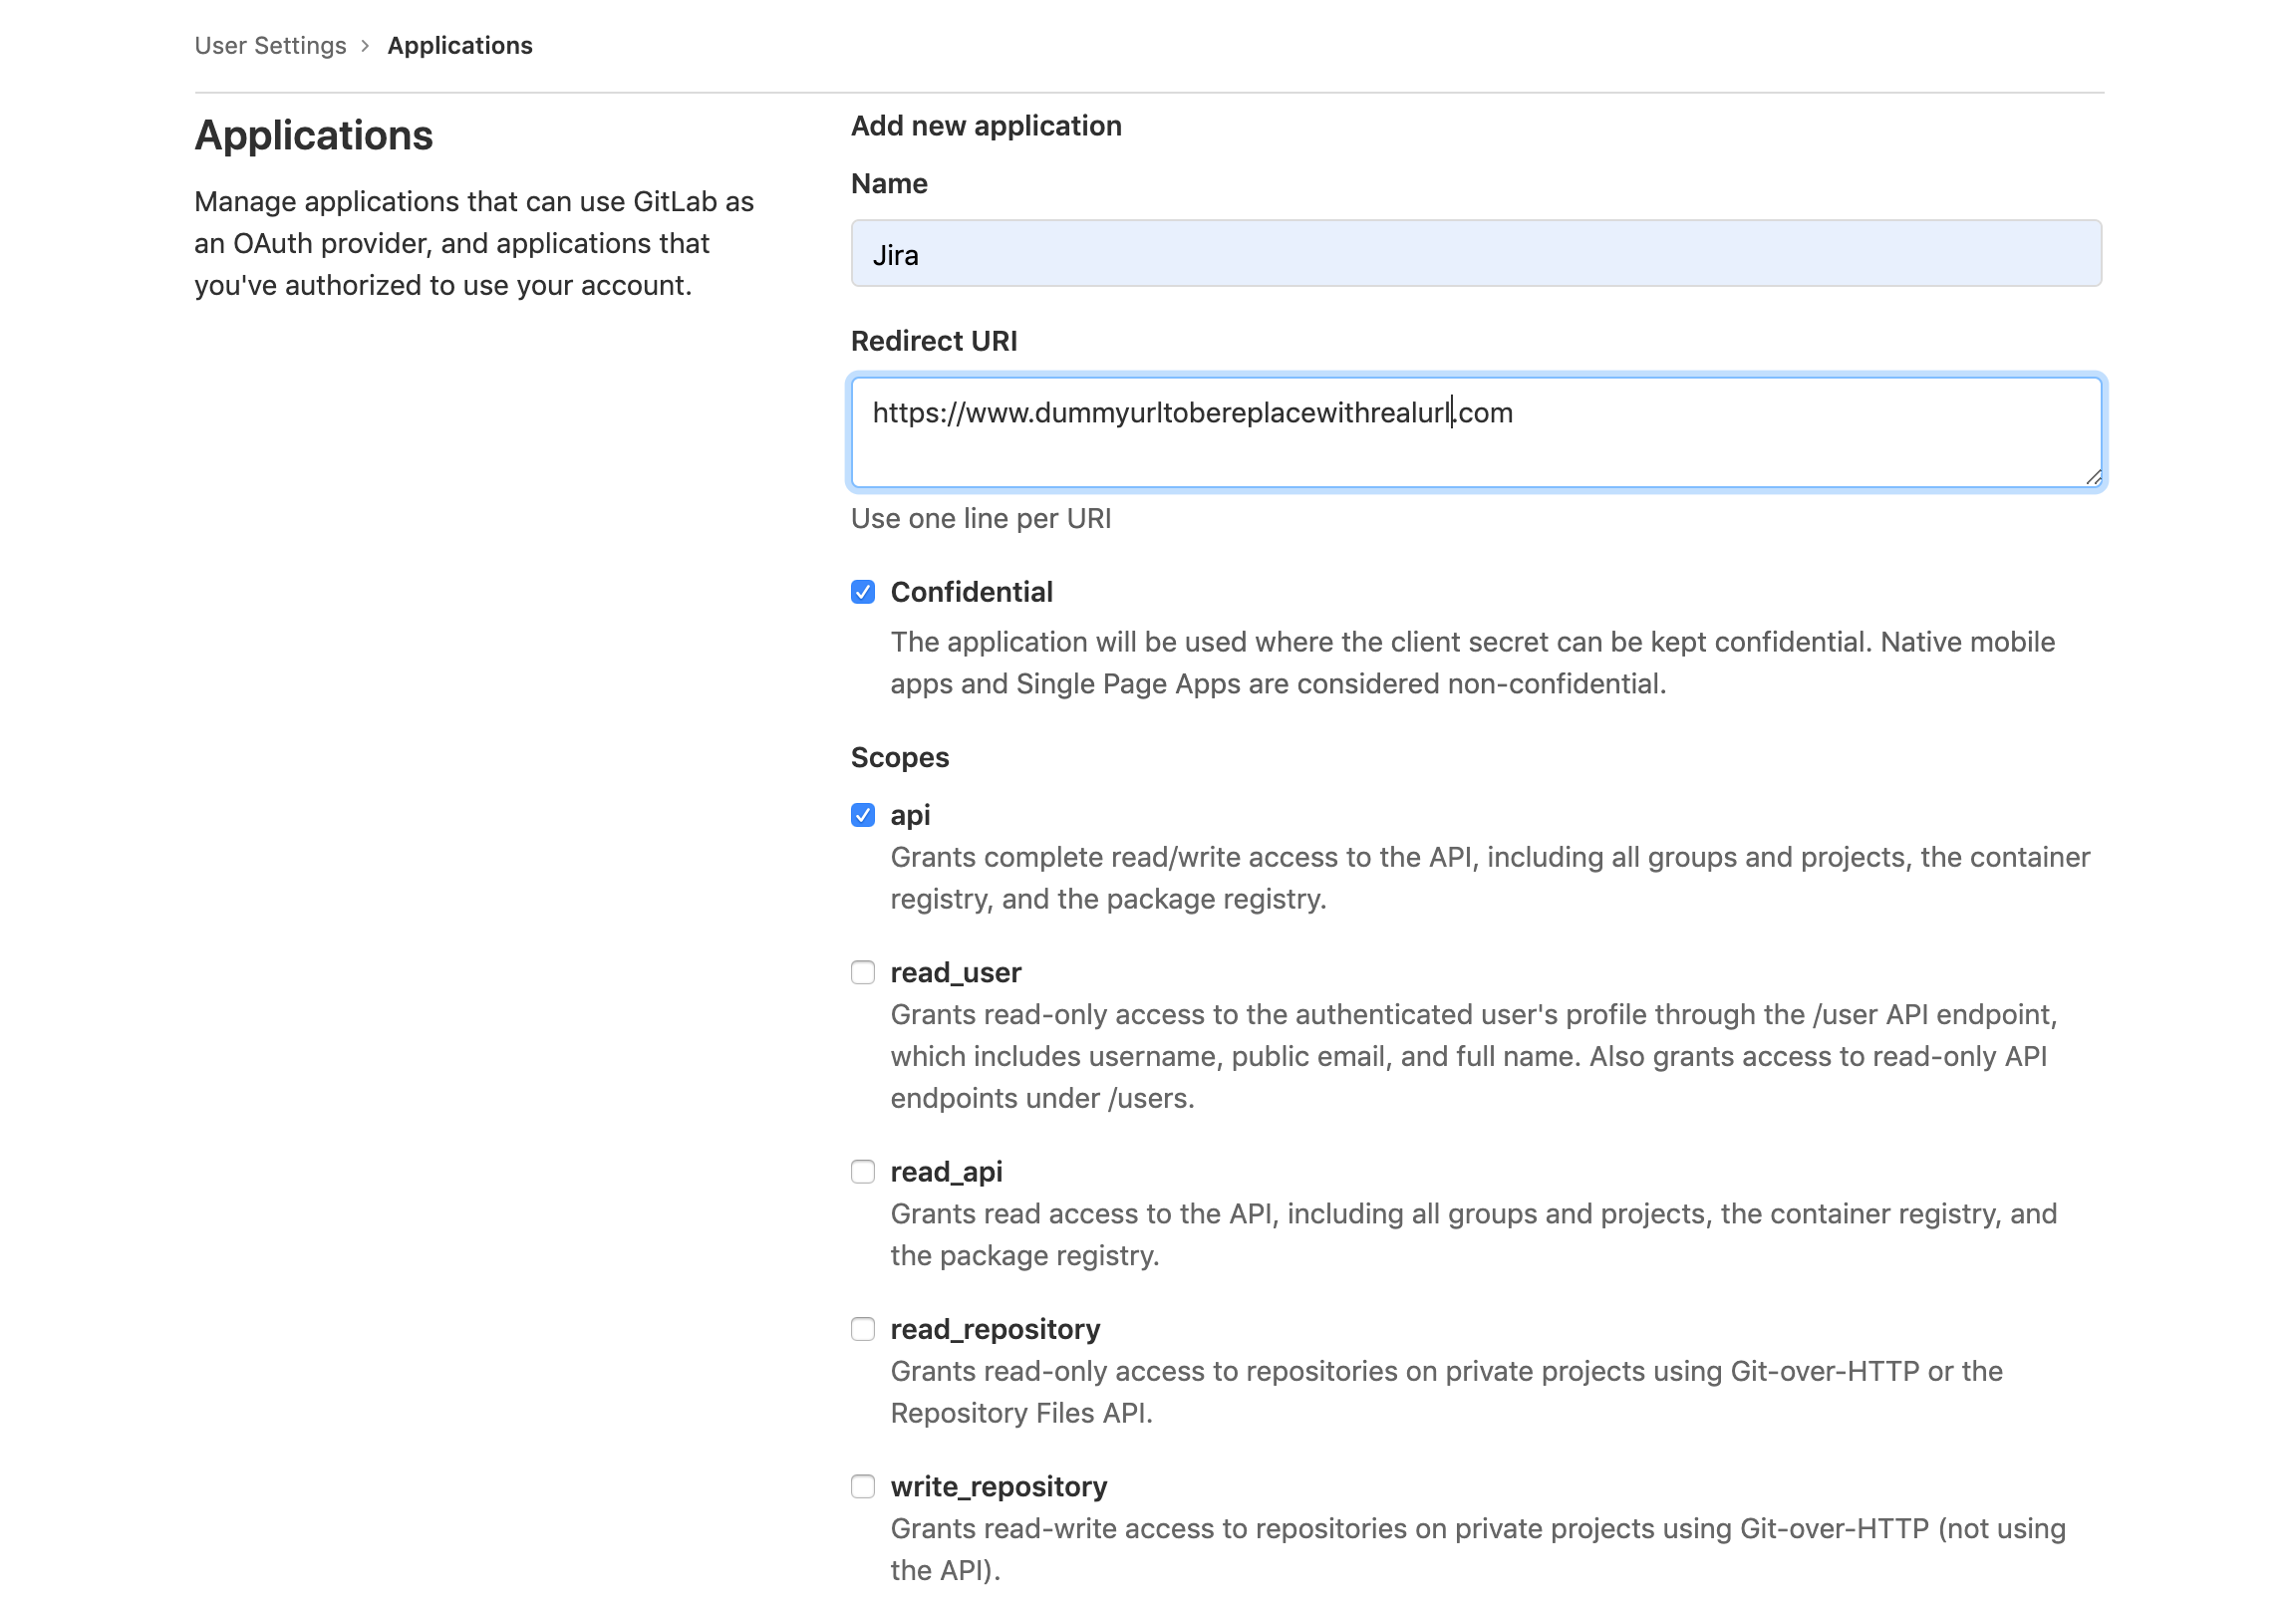
This will provide the Application ID and secret which will be used in the Jira OAuth 2 configuration creation.
Jira OAuth 2 configuration setup
On the Jira side, we will create the configuration in the OAuth system admin screen <jira-domain>/plugins/servlet/oauth2 under the "Custom" option. Use the GitLab Application ID for the "Client ID" field, GitLab secret for the "Client secret" field, and API for the "Scopes" field.
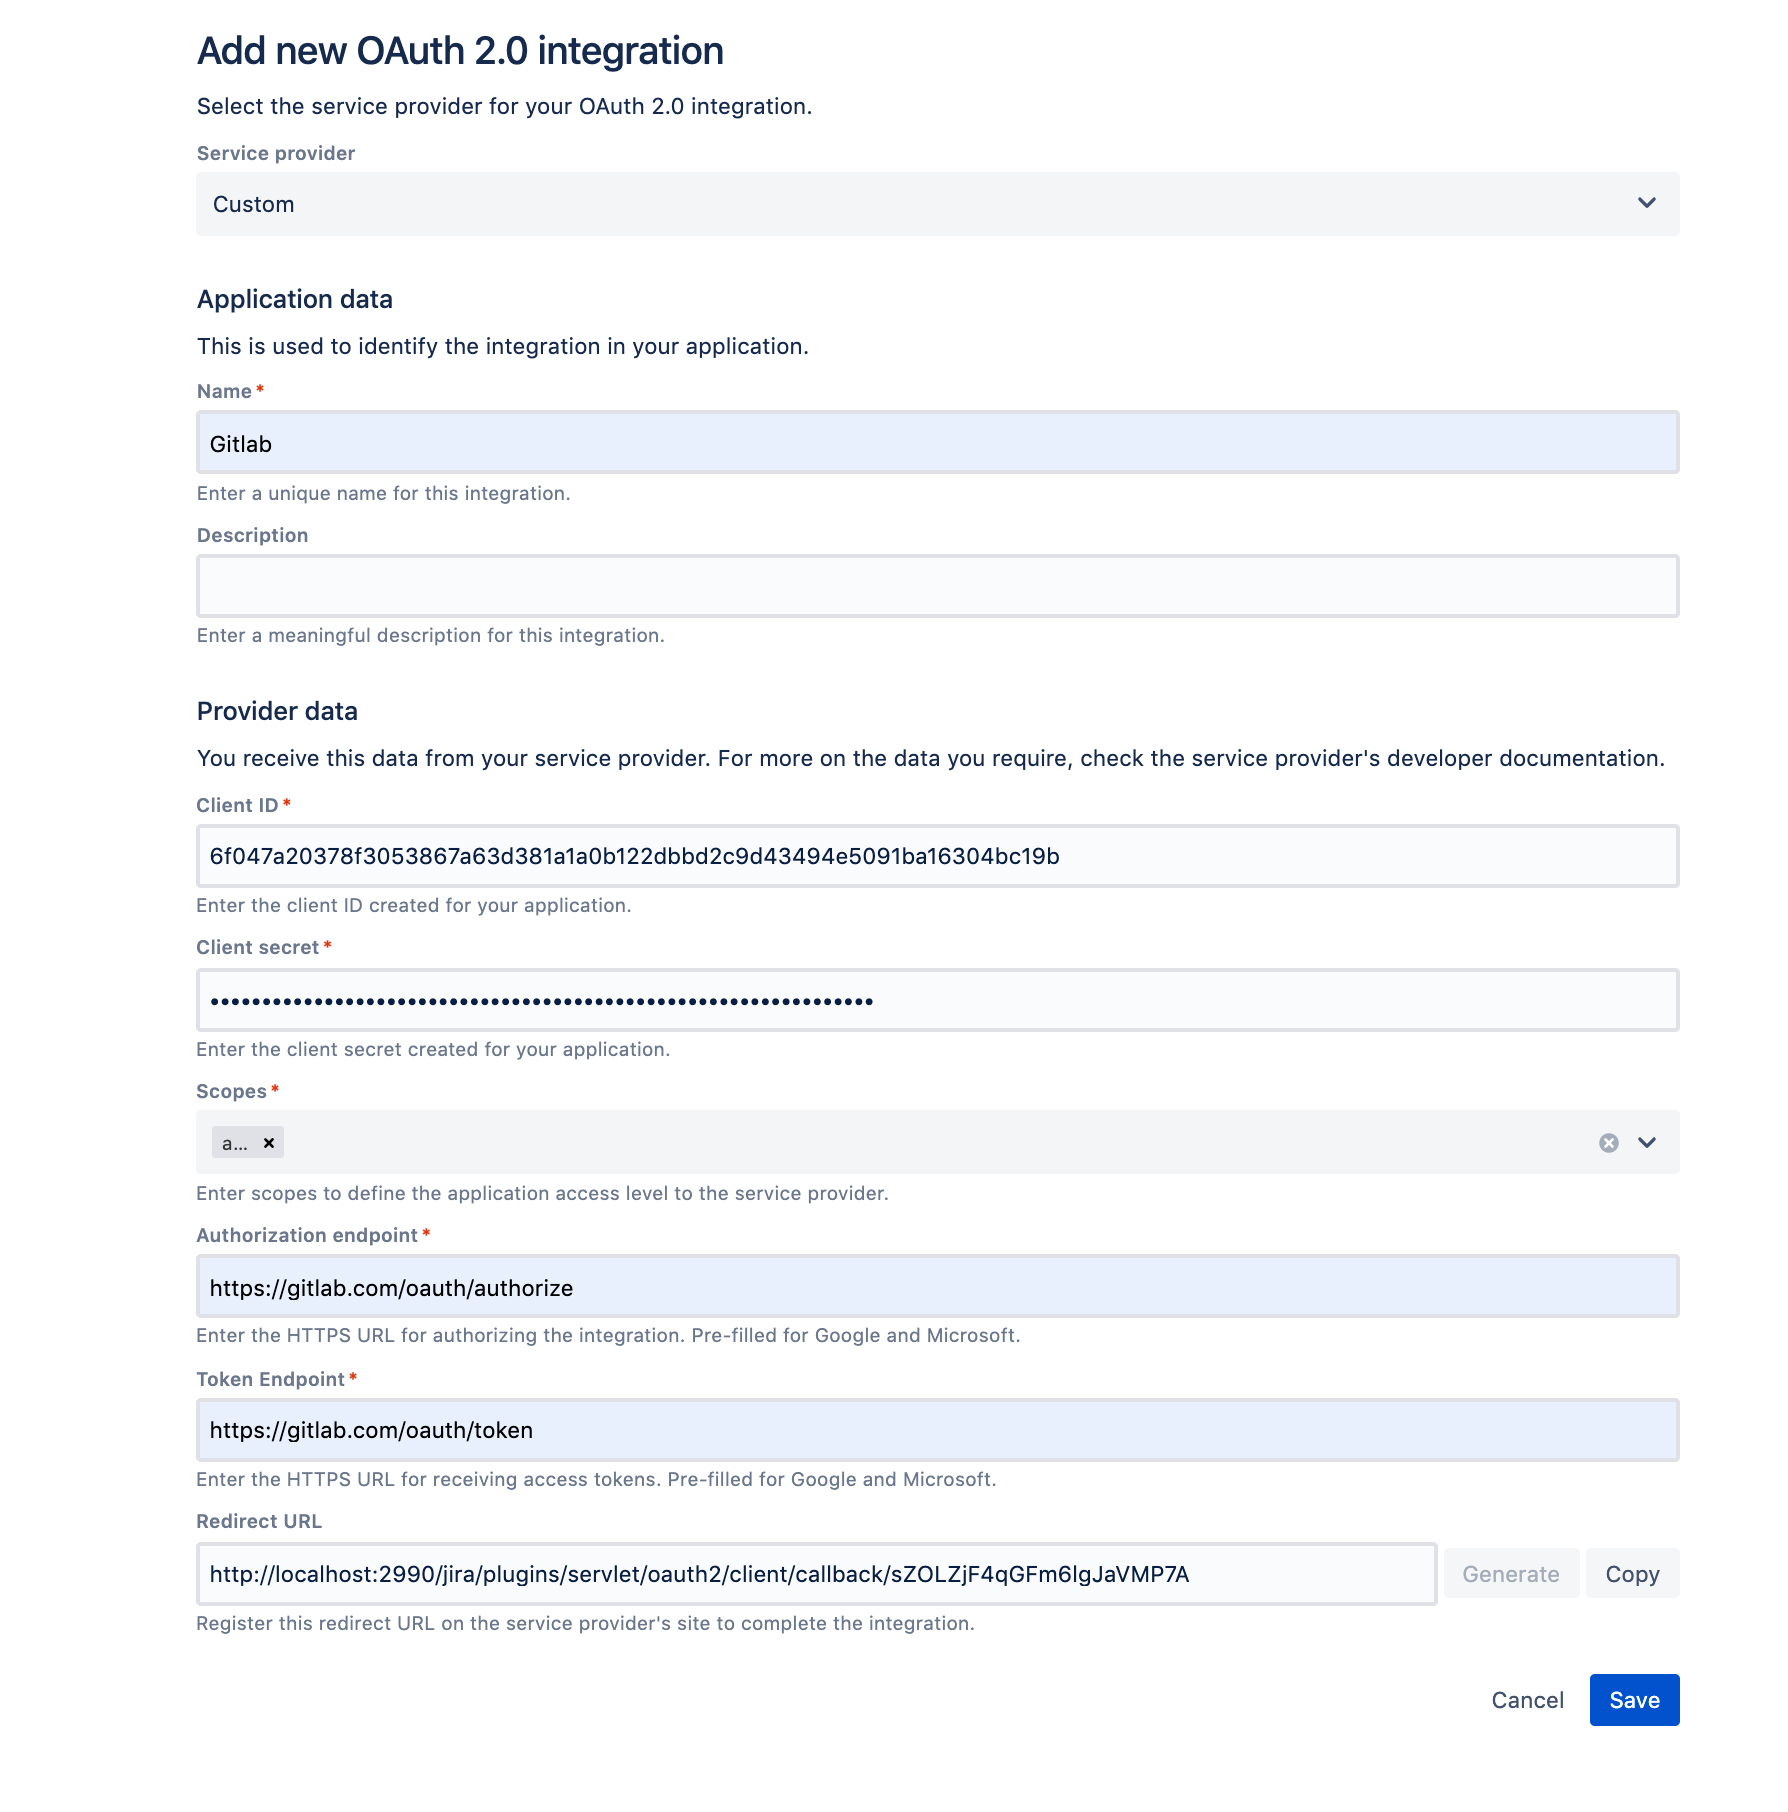
The "Authorization endpoint" and "Token endpoint" fields will depend on whether it is GitLab Cloud or on-prem, with cloud being https://gitlab.com/oauth/authorize and https://gitlab.com/oauth/token respectively, while on-prem will be similar but swapping https://gitlab.com for the url of the on-prem service.
Either on this screen before saving, or while accessing the the configuration again via edit, copy the redirect URL and go back to your GitLab OAuth configuration created earlier. Apply the redirect URL to its configuration.
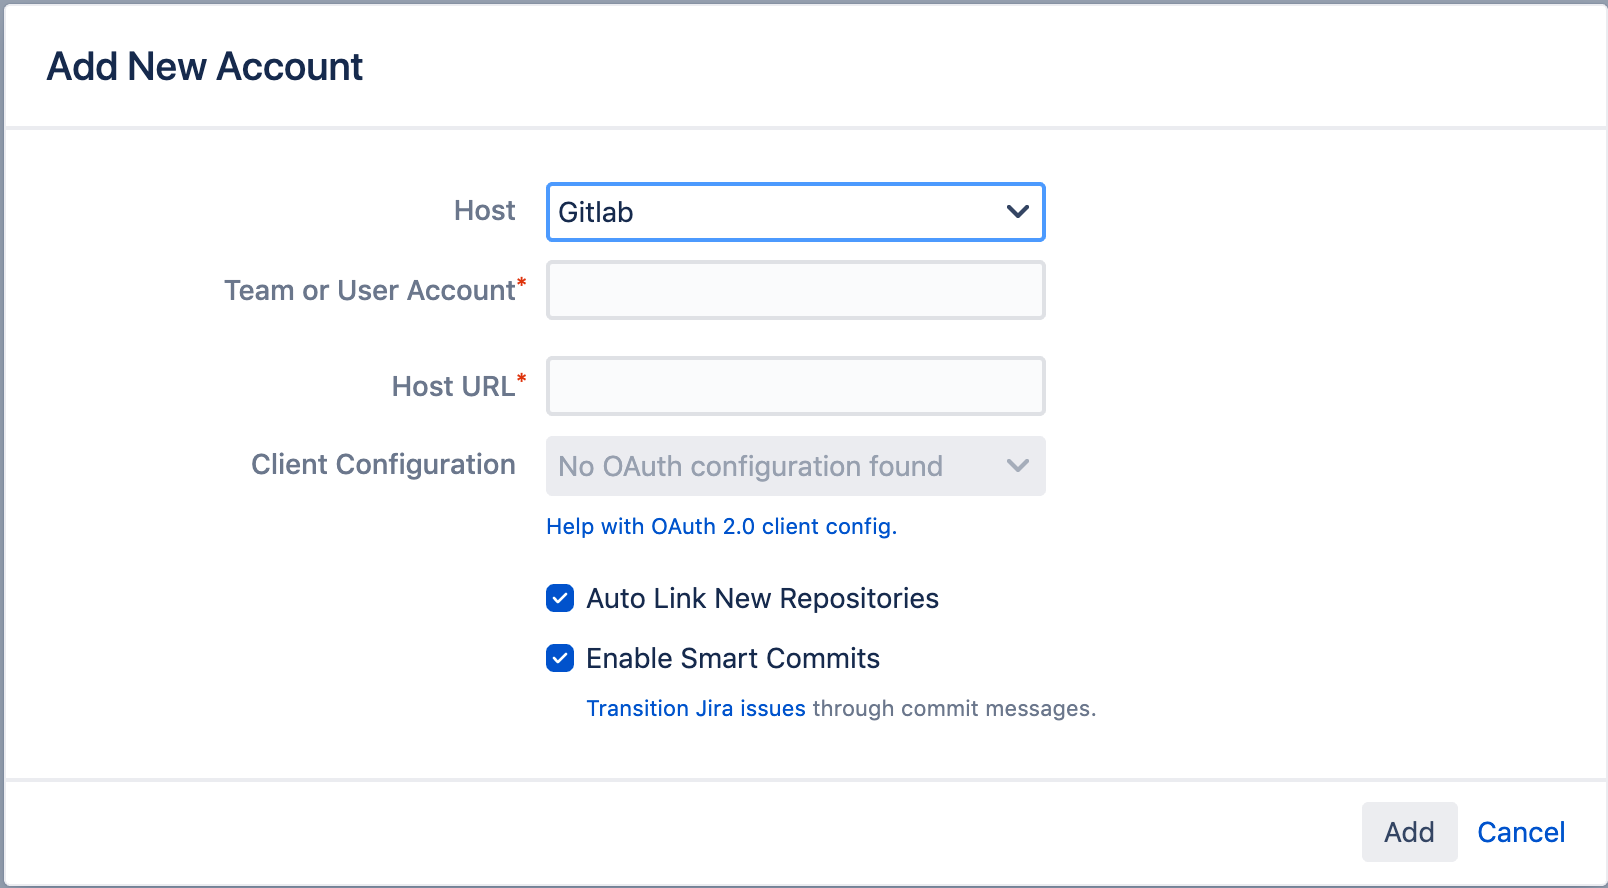
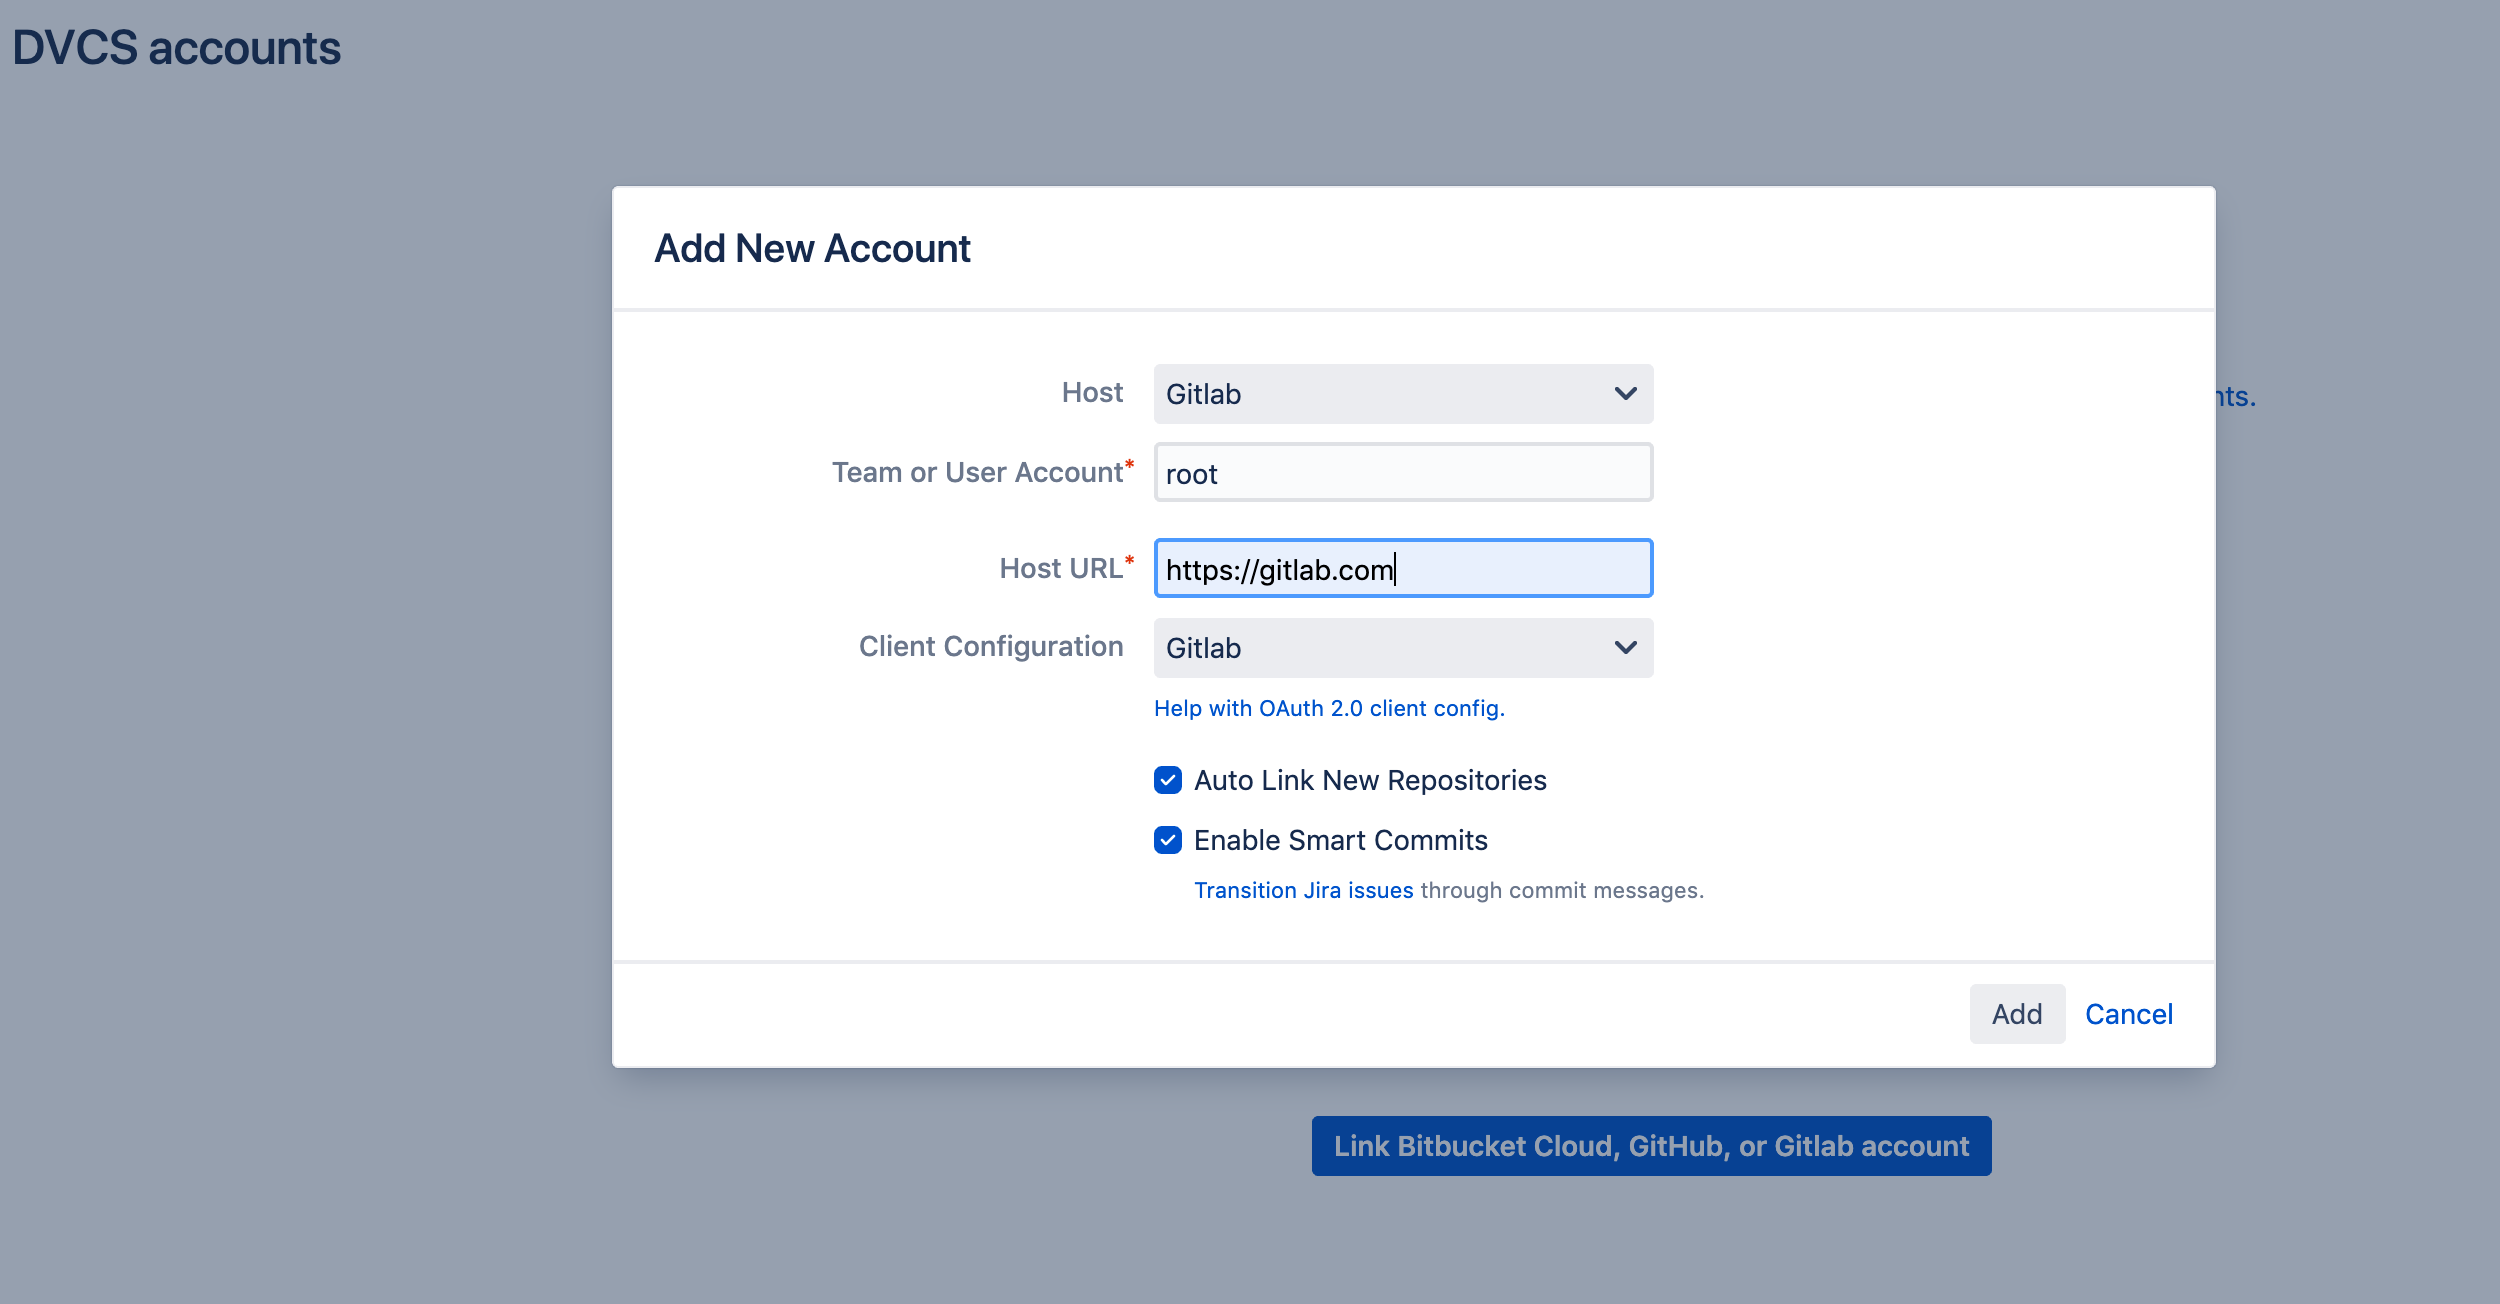
Once the OAuth configuration is setup, it’s a simple case of selecting it in the dropdown list when creating the GitLab integration. The "Team or User Account" will be the directory where the project resides, so for example https://gitlab.com/root in the screenshot below.
We will carry out a sanity check that the selected GitLab OAuth configuration contains the required scope of API. This can be changed via a system property with a whitespace delimited list of scopes.
1dvcs.connector.gitlab.required.scopes2dvcs.connector.gitlab.required.scopes=api sudo read_registryThis gives you the flexibility to change it if GitLab changes things on their side.
Was this content helpful?
Connect, share, or get additional help
Atlassian Community