How to configure program increment (PI) objective projects and boards
Learn how to create PI objective projects.
Background
Program increment (PI) planning is a cadence-based event for the agile release train (ART) that aligns teams and stakeholders to a shared mission and vision.
Teams create PI objectives before a PI planning event. The objectives summarize the business and technical goals the team intends to achieve during the PI. The team then further refines and manages PI objectives during the PI planning event.
Description
To complete the following, you will need Jira admin privileges or you will need to work with your local Jira admin.
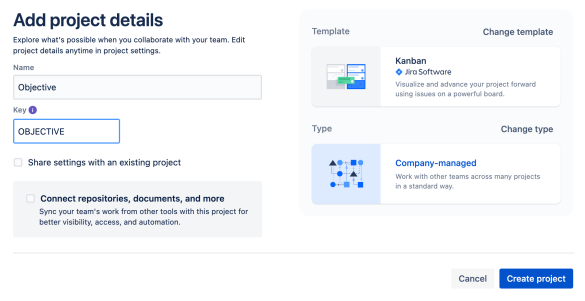
- In Jira: Create a company-managed kanban project named objectives.
- Select projects from the navigation menu and select create a project.
- Select kanban from the list of project templates.
- Select a company-managed project.
- Use the label "objective" for both the name and project key.
- We recommend leaving the checkboxes unchecked for share settings with an existing project and connect repositories, documents, and more. (See the example below.)
- Note: We do not recommend sharing settings with an existing project so the screens and issue types can be customized for this objective project.
- Note: We recommend creating an objective page within the master program PI planning space, rather than creating a dedicated new space for objectives, so that end-users can find information quickly.
- In Jira: Create new custom fields to manage objectives.
- Navigate to Jira admin settings for issues.
- Select create custom field.
- Note: Remember to search for existing fields that might be appropriate for scoring purposes before creating new fields.
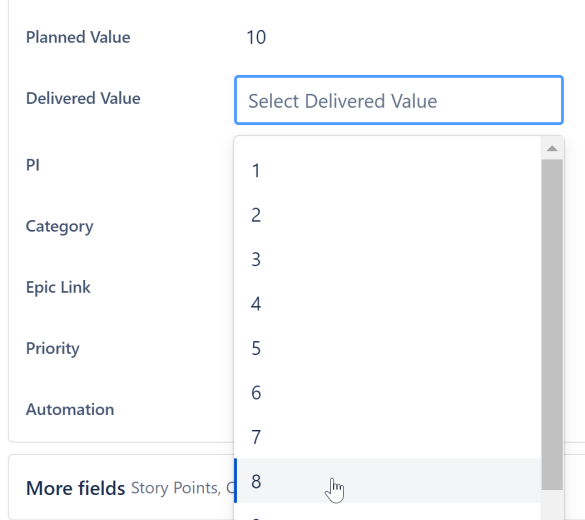
- Choose select list (single choice) field type.
- Note: Define numeric choices using 1 (lowest) through 10 (highest). We recommend end-users try to assign different value scores to each PI objective.
- Name the field "Planned value score."
- Associate this new field with all the appropriate screens.
- Repeat steps A-D for a new field called "Delivered value score."
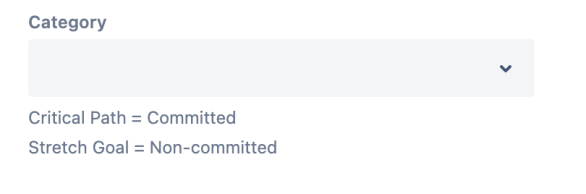
- Create a select list (single choice) field type named category to identify objectives you've committed to in the PI (critical path) versus uncommitted, or stretch goals.
- Associate the new field with all the appropriate screens for the objective project.

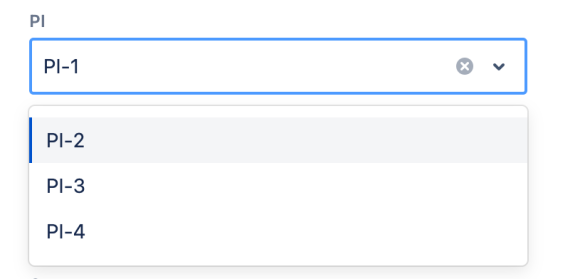
- For additional filtering, create a new field called PI (or the label your company uses to denote planning increments) and make this field type select list (multiple choices) and define the PI values.
- Prefix your PI select values with the program or portfolio indicator to use the PI custom field globally. For example: PI-Q1
- Associate this new field with all the appropriate screens for the objective project.
- Navigate to the objective project settings and verify all the objective issues screens contain the following fields:
- Issue type
- Description
- Planned value score
- Delivered value score
- PI
- Assignee
- Reporter
- Epic link
- Linked issues
- Team
- Add any additional fields needed
- Remove extra fields that don't apply to objectives to avoid confusion.
- In project settings, remove all issue types except epics. The objective board will only contain epic issue types to keep the solution simple for end-users.
- In Jira: Configure the objective board.
- Configure quick filters: In the board settings, select quick filters and create a quick filter to verify the objective status based on specific criteria such as PI, team, and category.
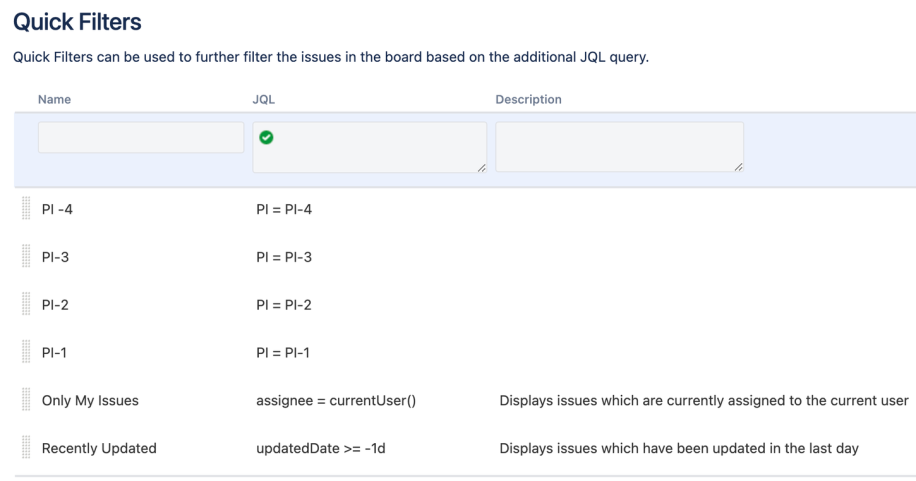 Quick filter settings
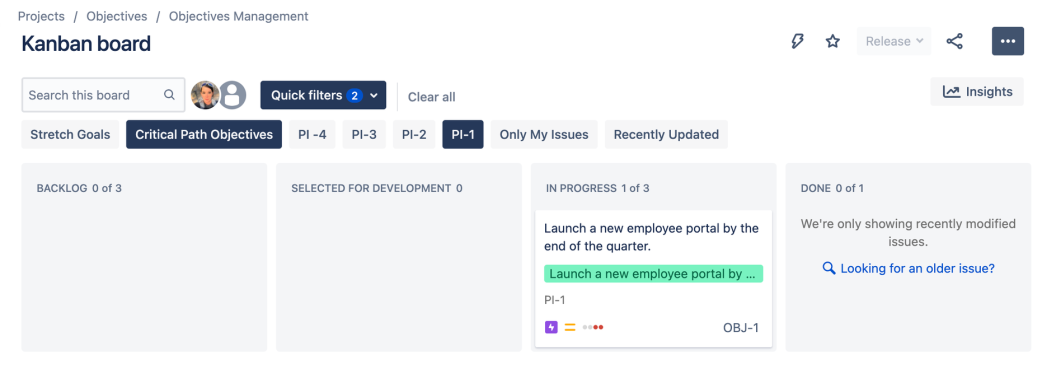 Use filters to view specific objectives for a given PI
 - Column labels can be updated based on your needs.
- Create a test objective issue to verify that the issue contains all of the fields needed, that the board reflects the objective statuses relevant to your organization, and that the quick filters allow you to drill down to the details required.
- In Confluence: Create a page to plan objectives and collaborate during PI planning
- Navigate to the program's PI planning space and create a new page.
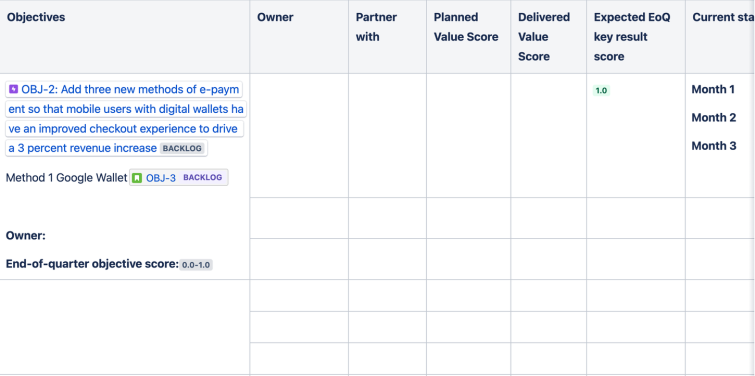
- We recommend using the built-in OKR template to plan and track OKRs (objectives and key results) and SAFe PI objectives. This template can be modified to fit your organization's process.
- For example, the template does not include planned versus delivered value scores. These columns will have to be added (see the screenshot below).
- Give your page a name that works for your process, and edit the page contents to add or remove columns and rows to meet your needs.
- Populate the page with the objective Jira issue links if they have been created. Or, you can create placeholder PI objectives so it's easy for business owners to update and refine during PI planning.
Tip: Add a shortcut to project pages in the left navigation panel to the objective Confluence page you created above.
Output
- PI objectives layout is ready for planned and delivered value in Jira.
- Now you can draft your PI objectives in Confluence to refine and assign planned value during PI Planning execution.
References
How to prepare Jira boards and filters
Previous step:
Was this content helpful?
Connect, share, or get additional help
Atlassian Community