How to refine planned work items for PI planning with Advanced Roadmaps
Learn how to validate that your team understands all aspects of a feature, thereby ensuring proper connection to quarterly planning objectives, risks, and dependencies in Advanced Roadmaps.
Background
- Validate ranked features and articulate descriptions, acceptance criteria, and target dates to help your team understand what the business as a whole expects of them.
- Review dependencies and risks associated with a feature to determine the team's level of confidence in delivering the feature.
- At the end of PI Planning, ensure the program is committing to work that is aligned with the objective.
Description
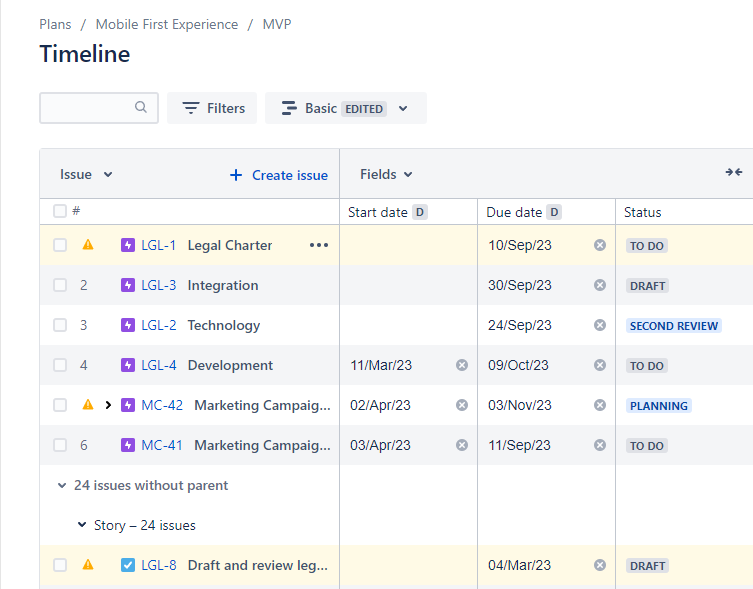
Navigate to "Shared PI Plan" in Advanced Roadmap
- Review the feature plan.
- Verify the highest priority features.
- Inspect the sequencing of feature backlog listing to ensure it matches business needs with appropriate due dates and status. Where clarity is needed, open up items to review more details.
- Check for issue IDs in numeric order, or titles in alphabetical order, as this may indicate a lack of ranking.
- Make adjustments and address flagged concerns.
- The formalized list of feature requests initiates subsequent kickoff activities that will be highly dependent on this starting point. Now is the time to make final changes if needed as the teams will be making quarterly commitments based on the ask.
- Address any items flagged with yellow markers or groupings.
- Manage dependencies.
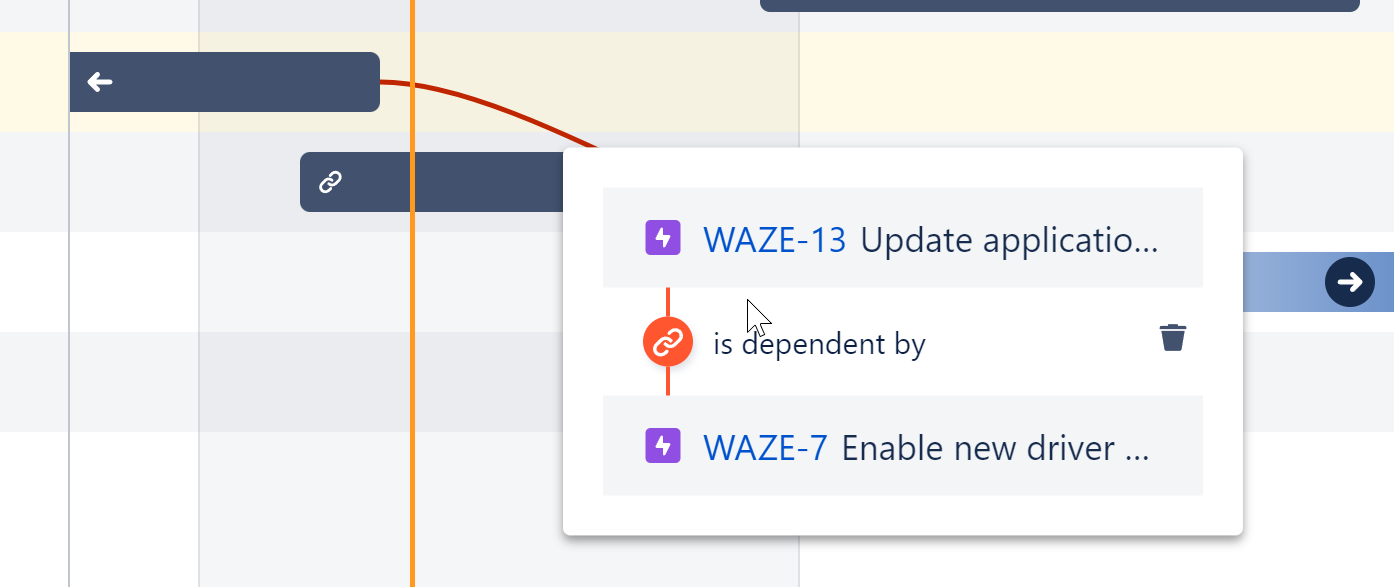
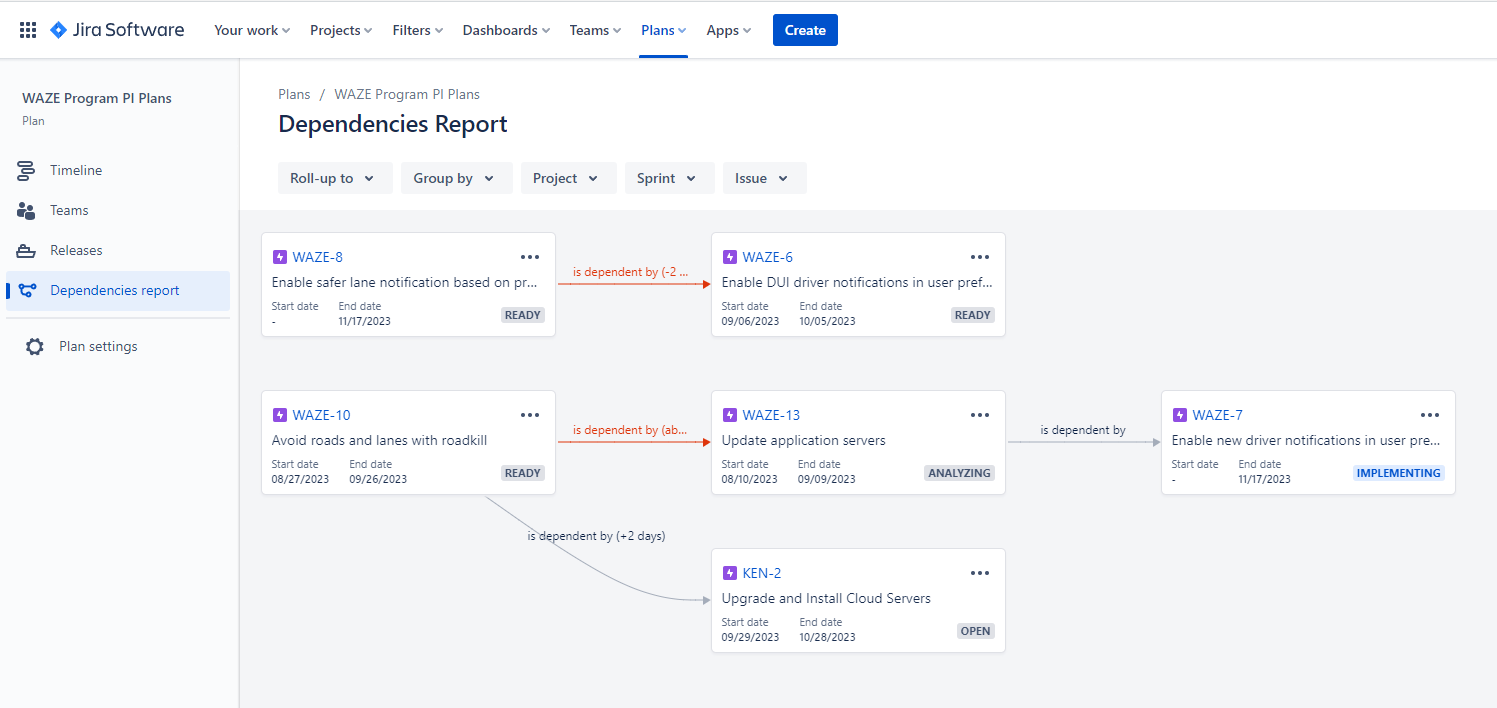
- Review existing dependencies.
- To view the details of the dependencies in your plan, select the badge on either side of the schedule bar. This will bring up the dependency details window.
- When viewing dependencies on your timeline, the badge on either end will turn red if there are conflicting dates. To resolve this, change the start or end date of either dependency.
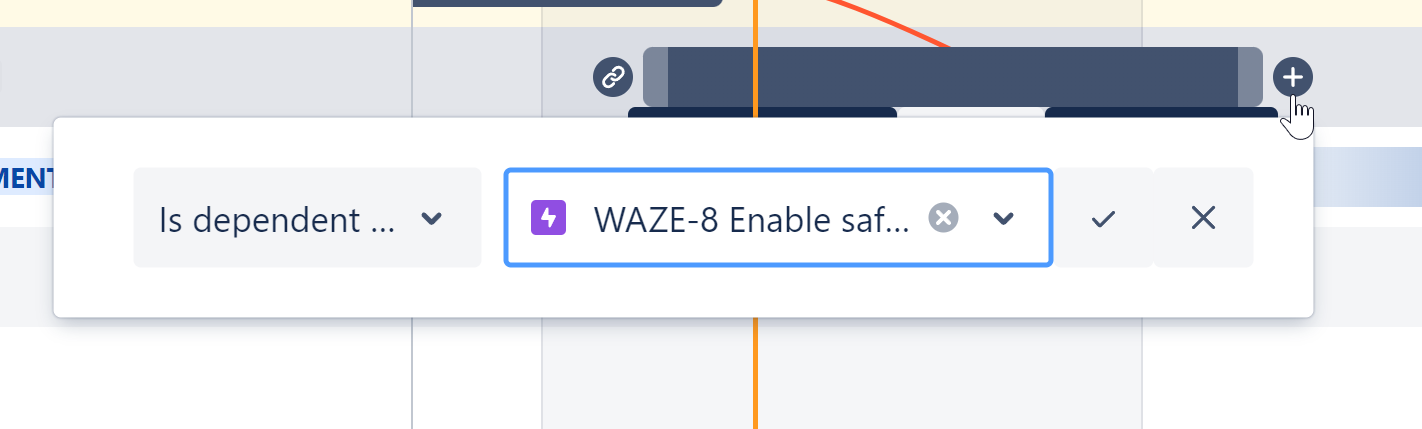
- Create new dependencies.
- To add a dependency to an issue in your plan, hover on the schedule bar for the issue to which you want to add a dependency.
- Select the + icon. Selecting the + icon on the right will create an outgoing dependency, while the left will create an incoming dependency.
- Select the issue to which you want to attach the dependency.
- Select the check mark to confirm your choice.
- After adding a dependency to an issue, adjust the dates by selecting and dragging the ends of the schedule bar. The badges on either end will turn red if there are conflicting dates.
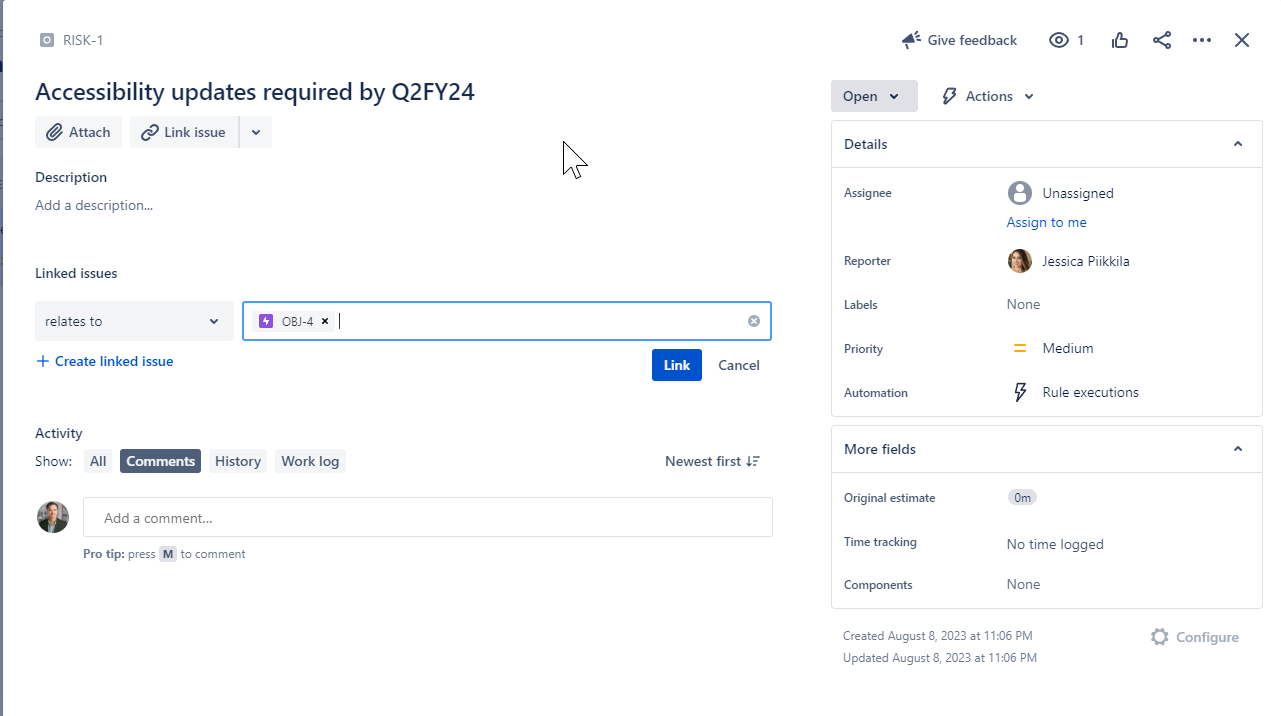
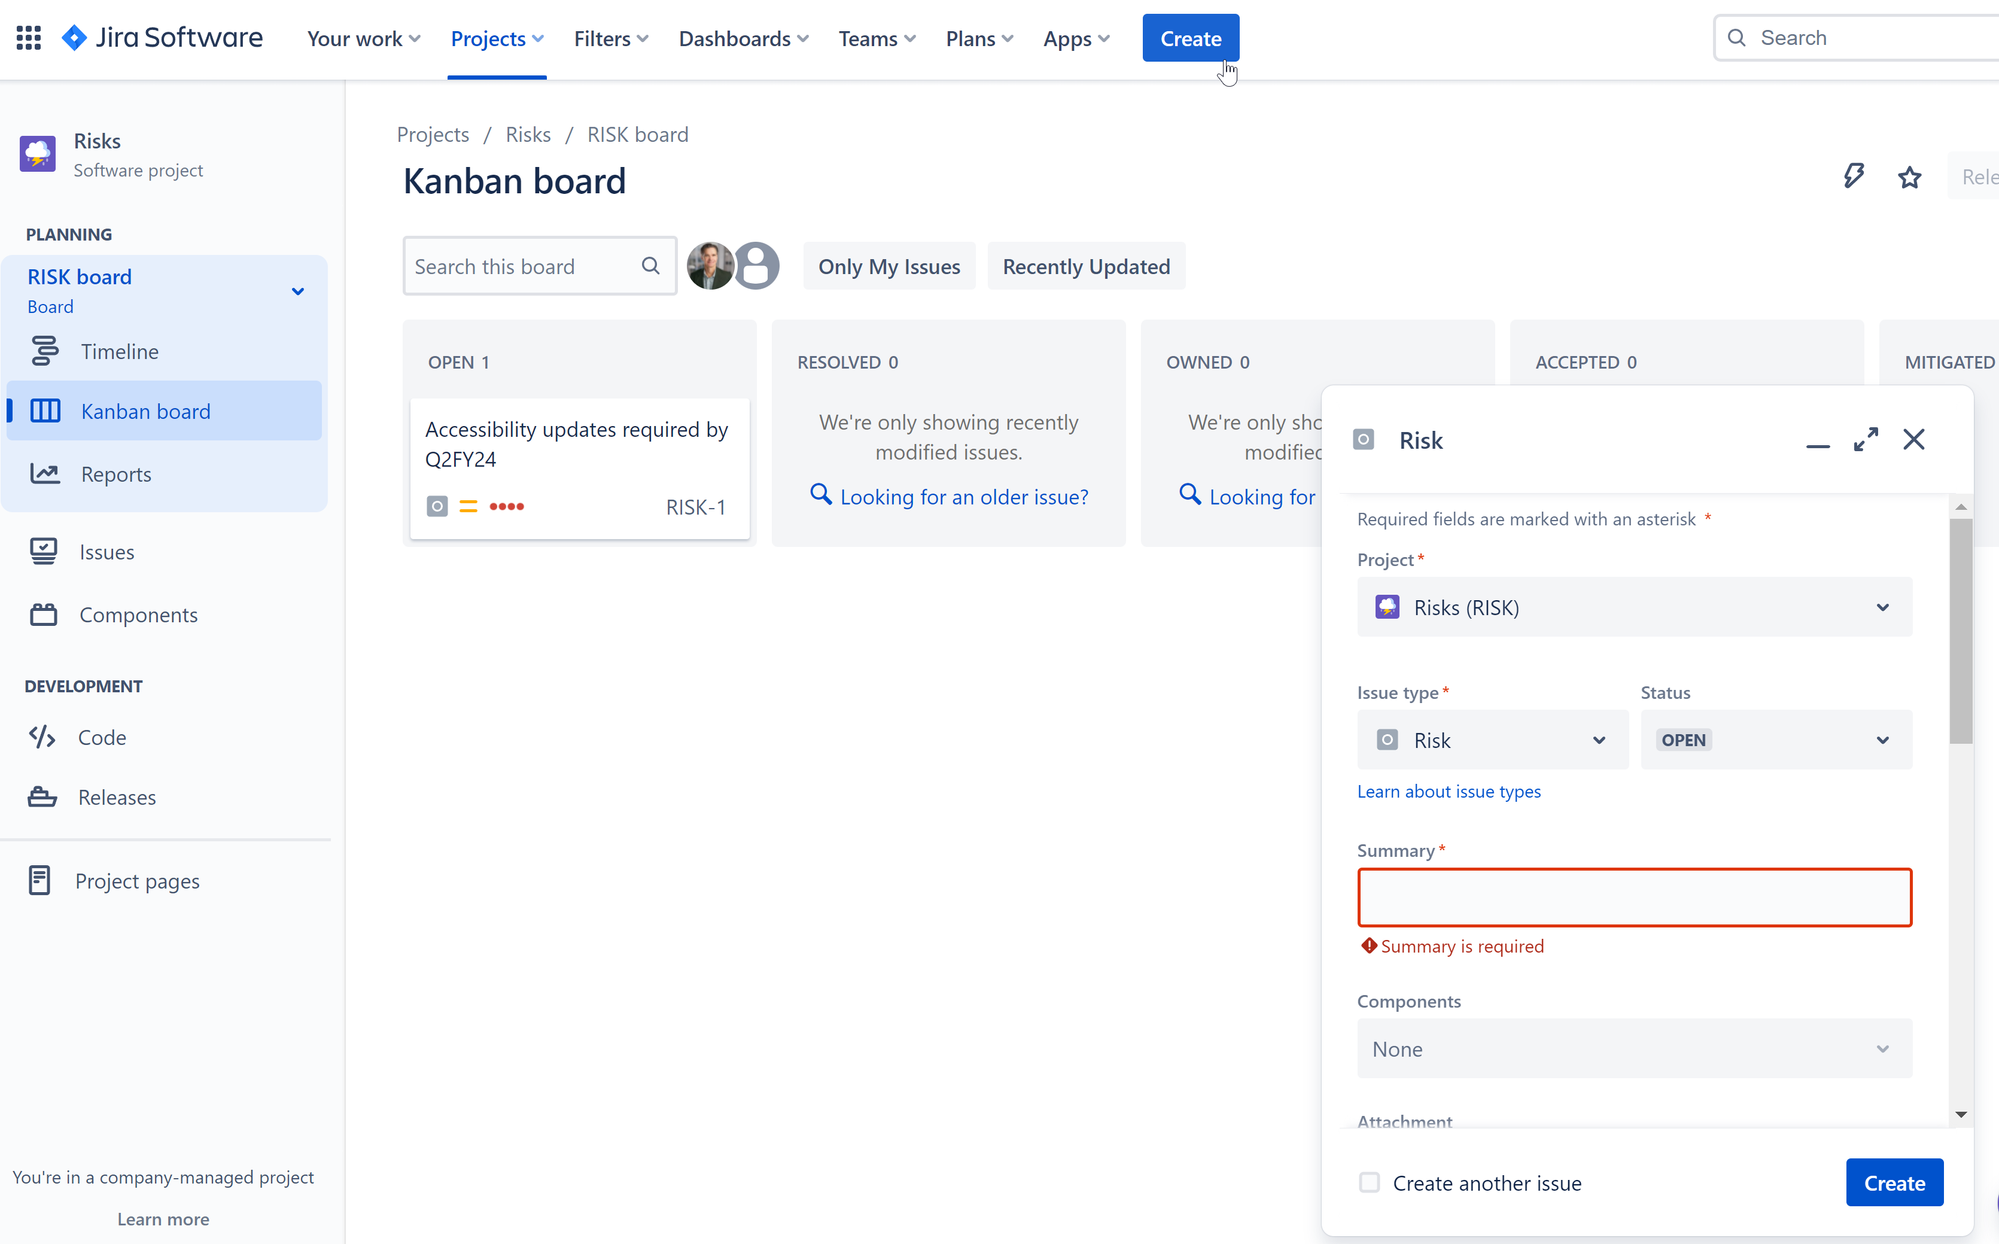
- Navigate to your risk board in Jira.
- Review existing risks.
- Create any additional risks needed.
- Ensure the risk or risks are linked to the feature using the relates to link.
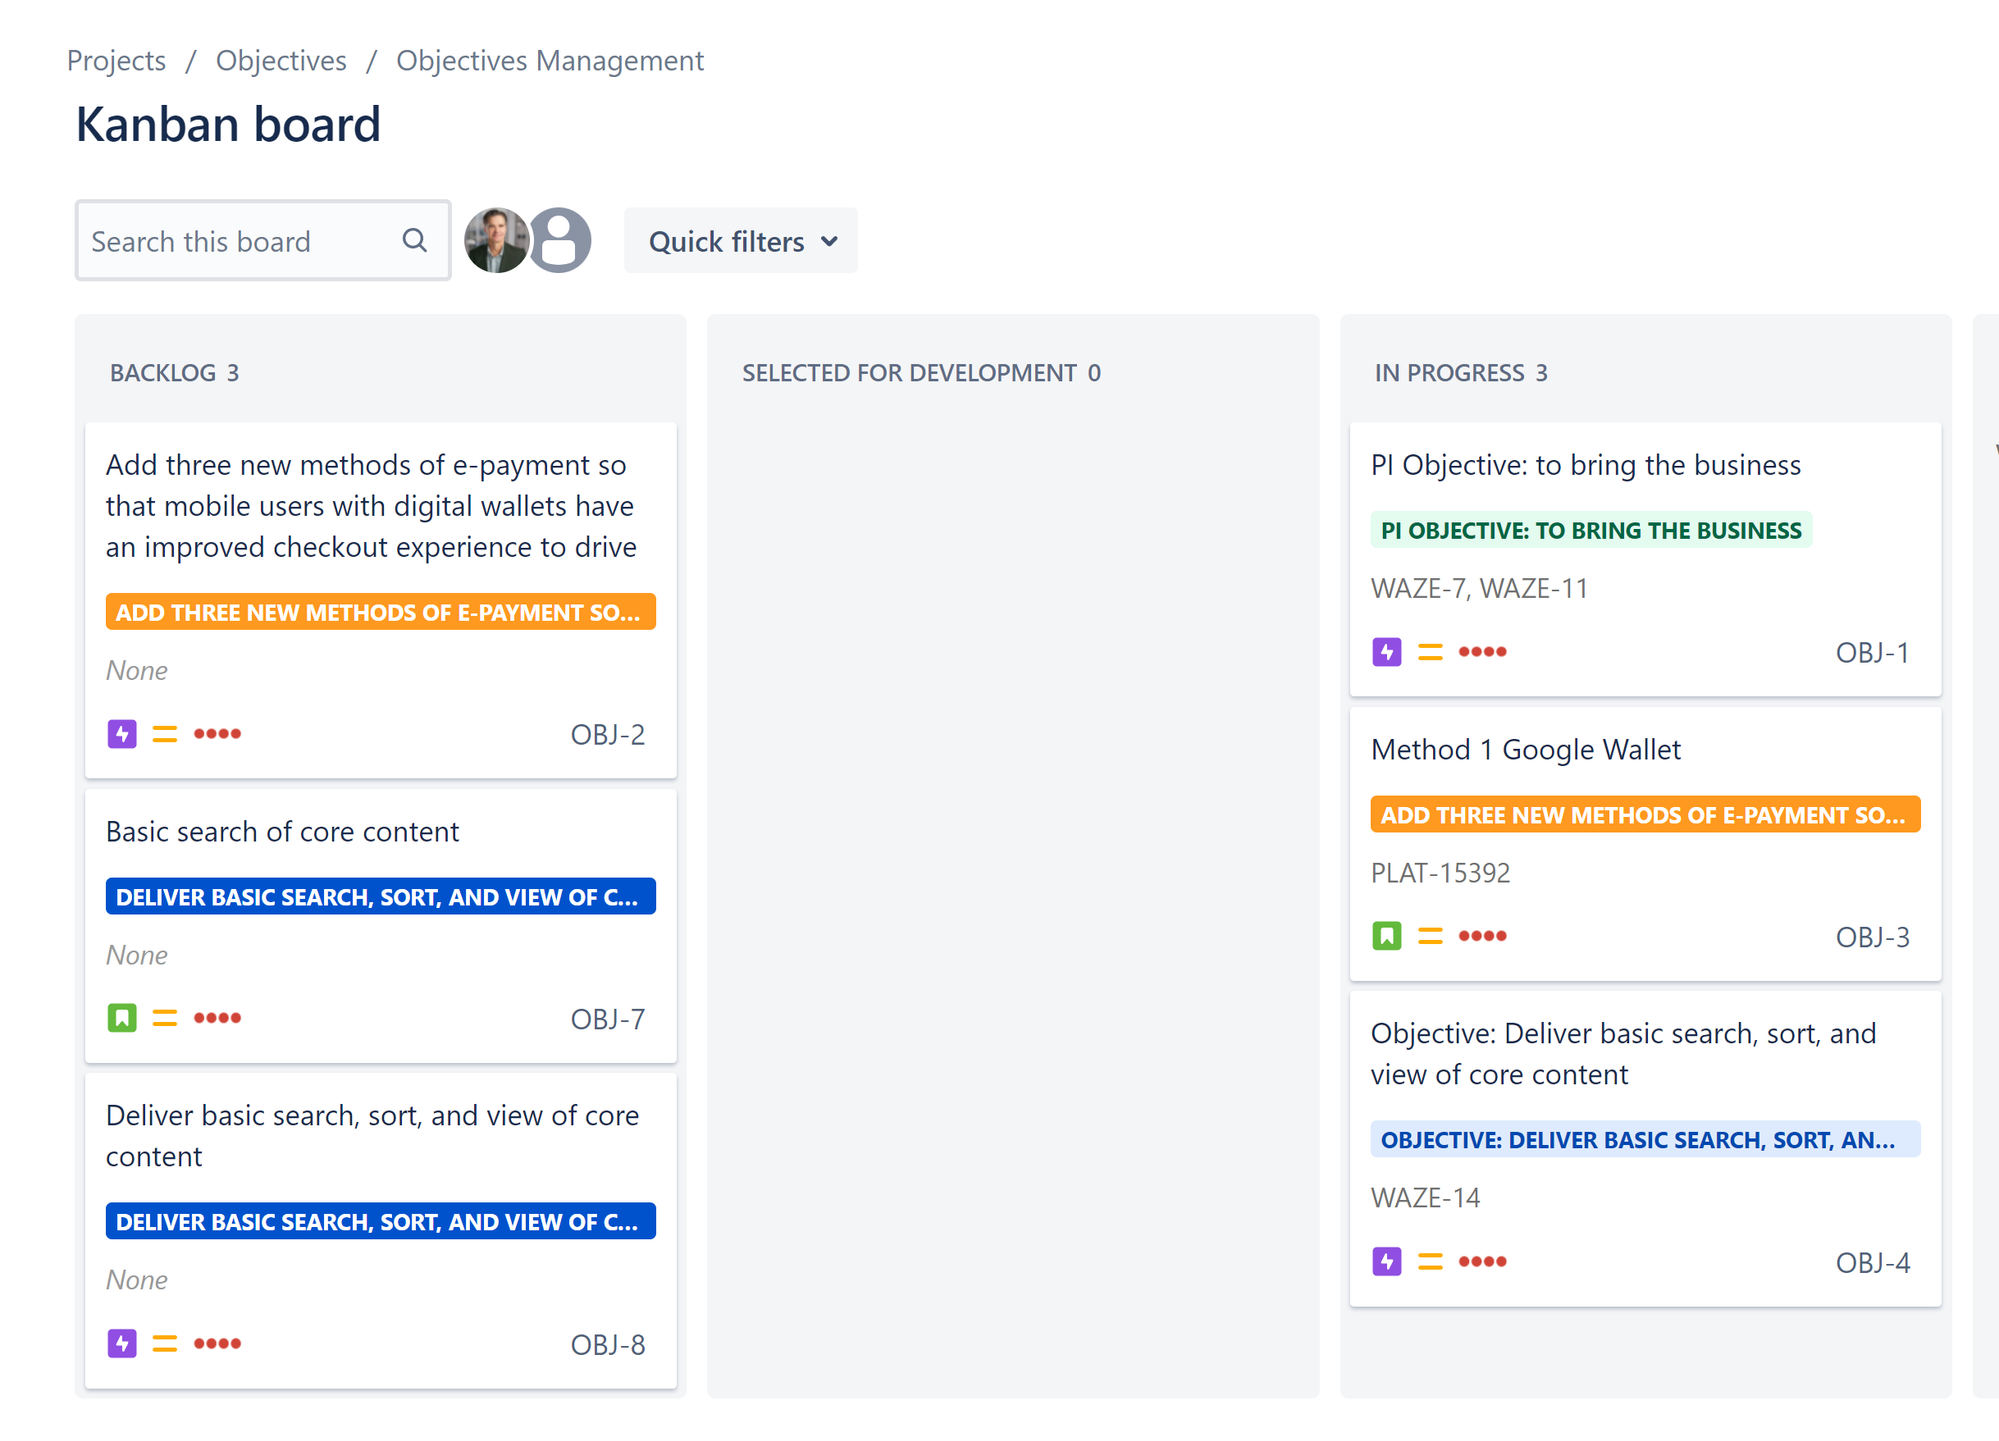
- Manage the risks you created during the PI planning event by dragging them into the correct ROAM status:
- Resolved: A risk is addressed and is no longer a concern.
- Owned: Someone takes responsibility for the risk.
- Accepted: Nothing more can be done. If the risk occurs, the release may be compromised.
- Mitigated: The team has a plan to adjust if necessary.
- Review and confirm your features are associated with the appropriate objectives.
Note: Track the objectives in Confluence and display objectives coverage in Jira using a label or a custom field.
Output
- Refined and committed PI plan with ROAMed risks, committed objectives, and managed dependencies.

References
Background
Previous step:
Was this content helpful?
Connect, share, or get additional help
Atlassian Community