How to configure Jira and PI plan in Advanced Roadmaps
Background
Description
You will need a Jira admin to complete the below Jira configuration steps. Please note, some of these items may have already been implemented from other solution guide pages. Think of this as a full inventory of all the system configurations and disregard steps to create custom fields or projects that already exist.
- Verify all the end-users are able to access the plan tab in Jira: Types of permissions in Advanced Roadmaps.
- Create WSJF fields and WSJF calculation.
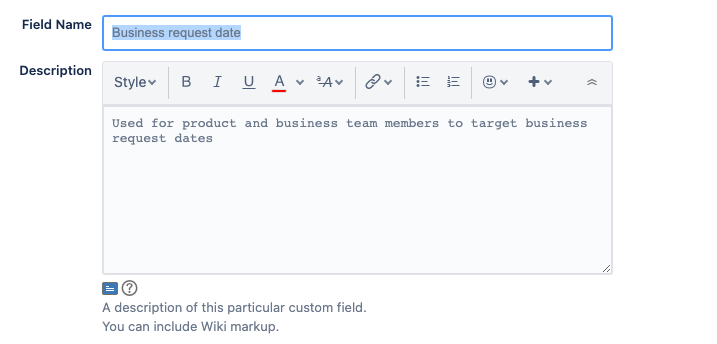
- Create a custom field called business request date using the date type field.
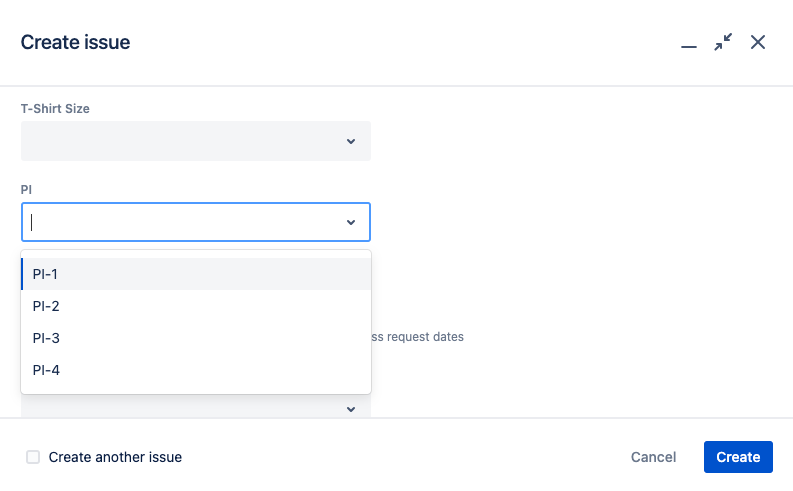
- Confirm the PI custom field is present on Jira epics.
- Note: Creating the PI custom field is referenced in How to configure program increment (PI) objective projects and boards.
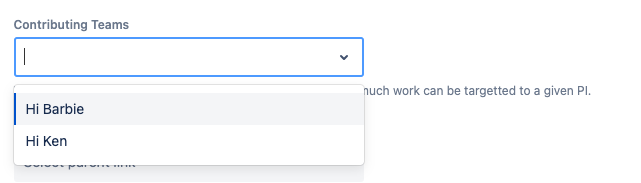
- Create a new multi-select custom field called contributing teams with your organization teams as options.
- Add this field to the Jira epic issue type you'll use for planning with Advance Roadmaps.
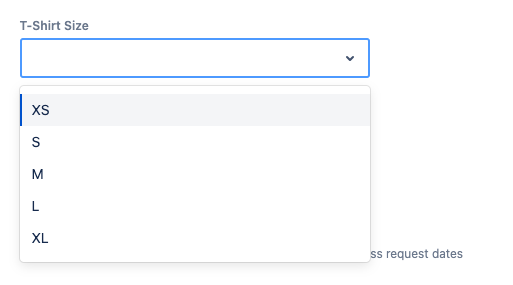
- Create a new single-select custom field called t-shirt size for Jira epic.
- Create a new company-managed project for program features. This project will only include Jira epic issue types.
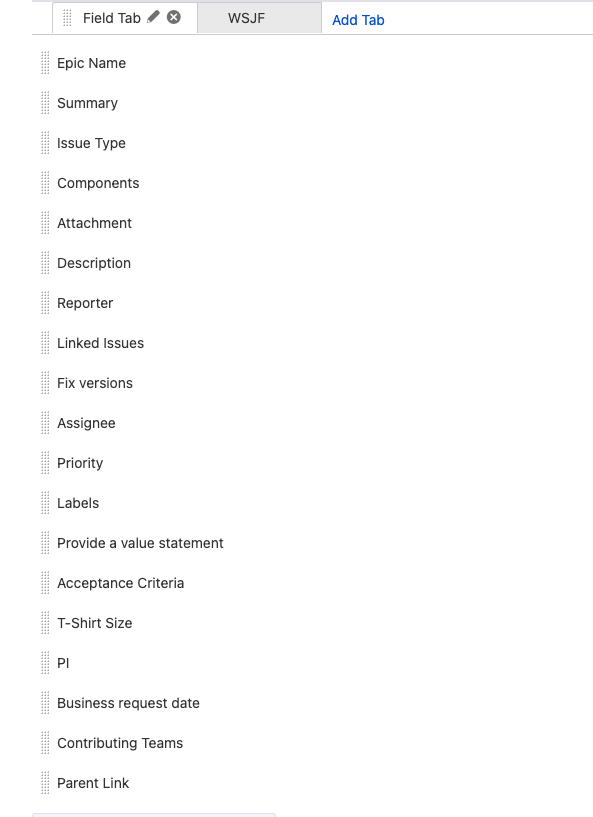
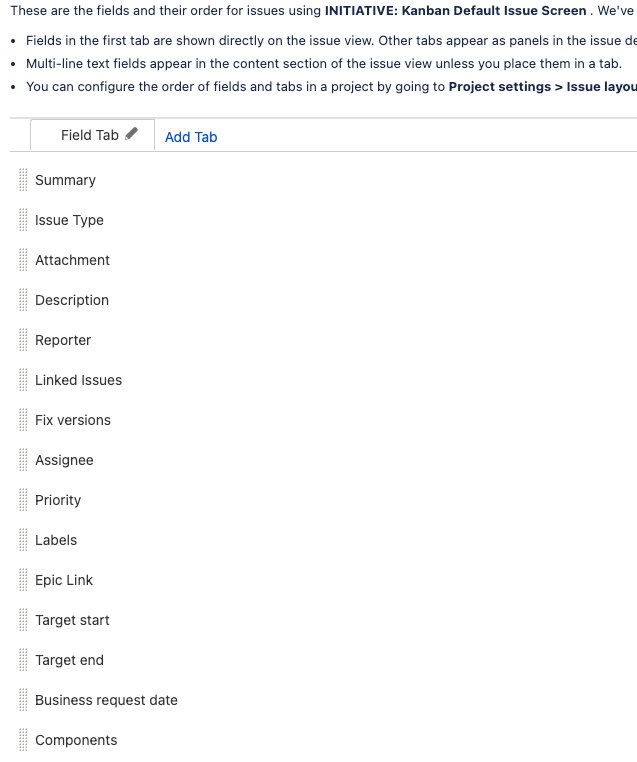
- Include all the following fields in the screenshot for create, edit, and view screens for Jira epics.
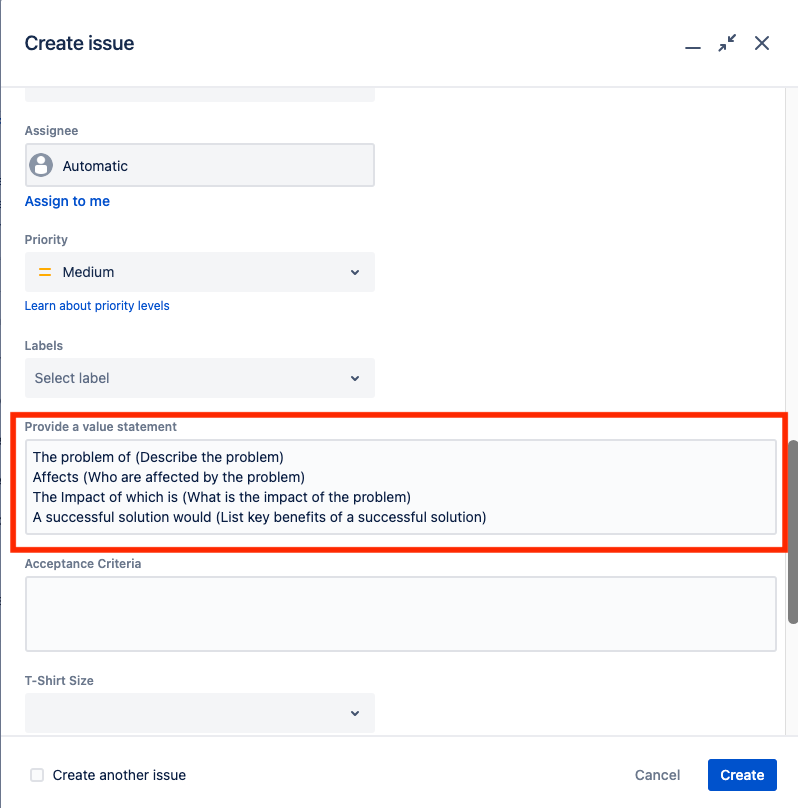
 Create a paragraph custom field called value statement and include the value statement prompts as the default value. See the example value statement in the screenshot.
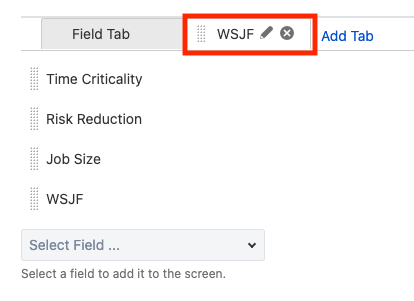
- Add the field to the Jira epics issue type
- Create a new company-managed objective project using the kanban template and objective issue type.
- Note: Creating the objective project and issue type is referenced in How to configure PI objective projects and boards.
- Create a new company-managed project for initiatives using the kanban template. This project will only include initiative issue types.
- Create initiative issue type. Include all fields for create, edit, and view screens.
- Update the organization hierarchy.
The following steps are for the PI plan admin to configure.
Note: PI plan admin in this document refers to the person or people who will be editing and configuring the plan and will require Advanced Roadmaps user permissions.
- Navigate to the PI planning prep page or the program team pageand reference the projects and boards the team currently works in.
- Identify feature issue sources that may appear outside of the team boards.
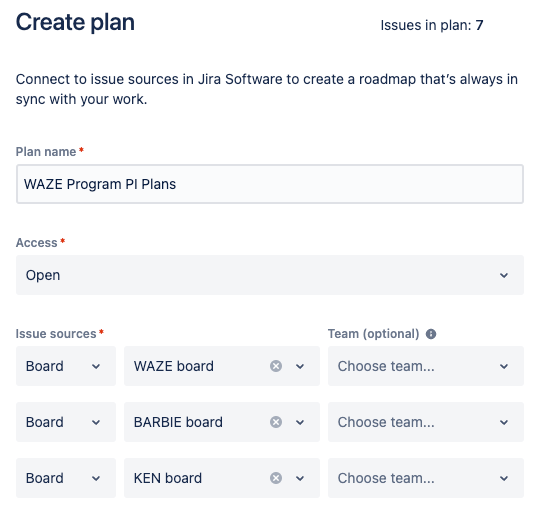
- Select plans, select create plan.
- In create plan: Give the plan a name that clearly identifies the program and PI plan. For example, “Waze Pprogram PI plans.”
- For access, select open.
- For issue sources, include all the issue sources that will be needed to target Jira epics to the upcoming PI.
Note: We strongly recommend you create all Jira epics in their own single project for process visibility and approval. This is a great way to manage works in progress (WIP) and enable accurate reporting. However, if a single epic program project is not an option, then each team should create and manage its own epics in their projects. You can then create a kanban board with all of the program Epics you'll use as an issue source.
- Refine issues displayed, and set exclusion rules as needed.
- Select create
Note: In your newly created plan, review the data results presented and begin to modify configurations.
- Select plan settings.
- Select scheduling and choose the appropriate estimation option.
- For dates, select target start and target end.
- For inferred dates, select the appropriate option.
- For dependencies, select concurrent. We recommend concurrent, especially for Jira epics, so start and end dates can overlap.
- Saved views will be covered below in the create and save views section.
- Select issue sources and make any modifications as needed. We recommend using boards over filters if possible to reduce the need for filter maintenance.
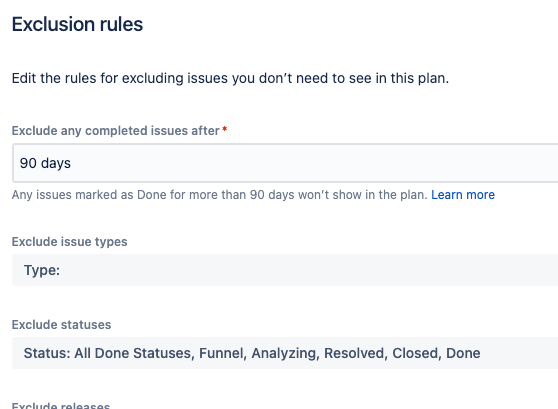
- Select exclusion rules and other source data options as needed. We recommend setting exclude any completed issues after* to 90 days.
- Select removed issues and make any additions as needed.
- Select custom fields.
- Select add custom field and include all unsupported or custom fields relevant to epic value assignment, estimation, and prioritization. We recommend including the following fields:
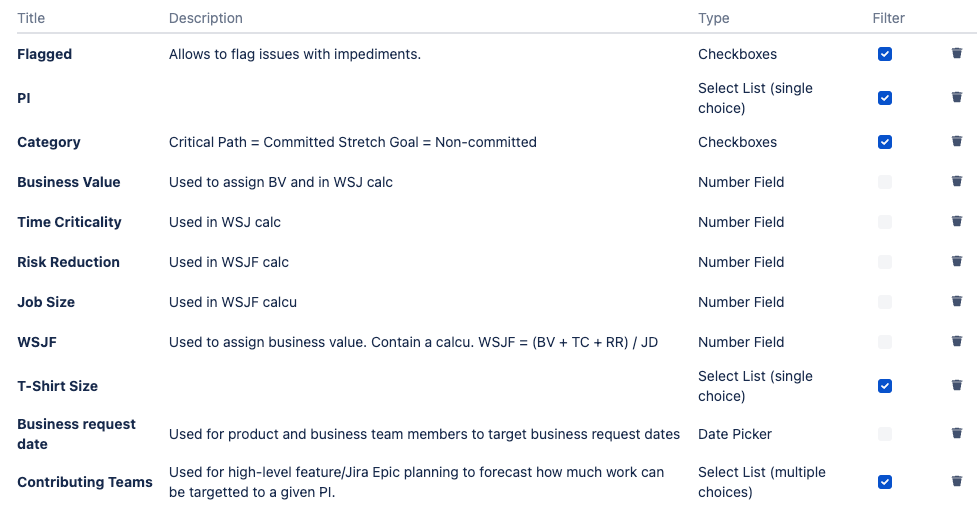
- Add additional fields as needed.
- Exit plan configuration and select back to plan.
- Select teams.
- Select add teams to your plan.
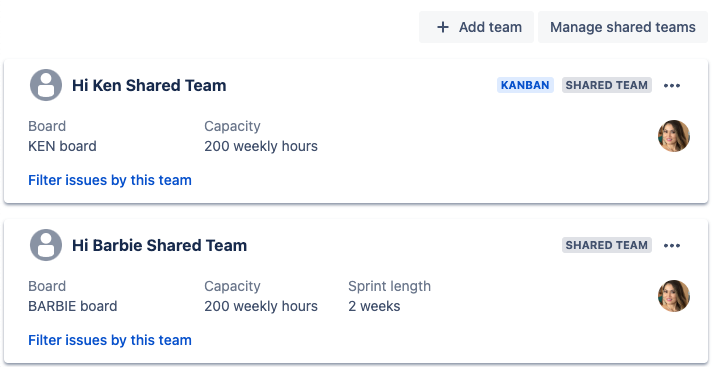
- In managed shared teams:
- Create a shared team for each of the teams in the program shared teams.
- Within your PI plan, select teams
- Select add existing team
- Add the required shared teams for the program
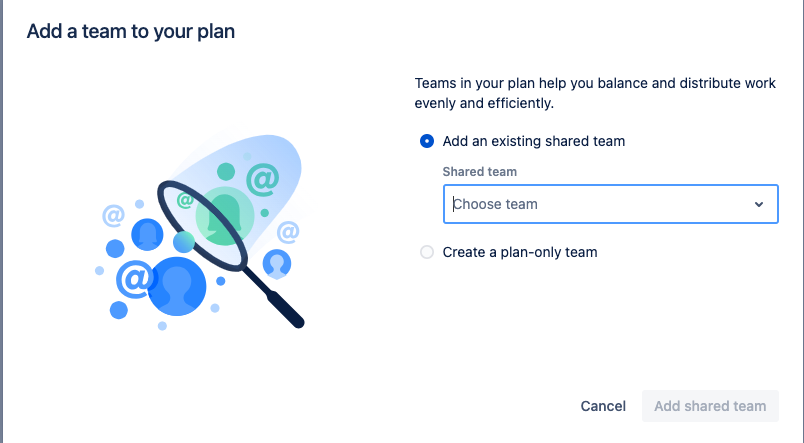
- Go back into each team's setting, make adjustments as needed, and confirm each team is associated with their team issue source.
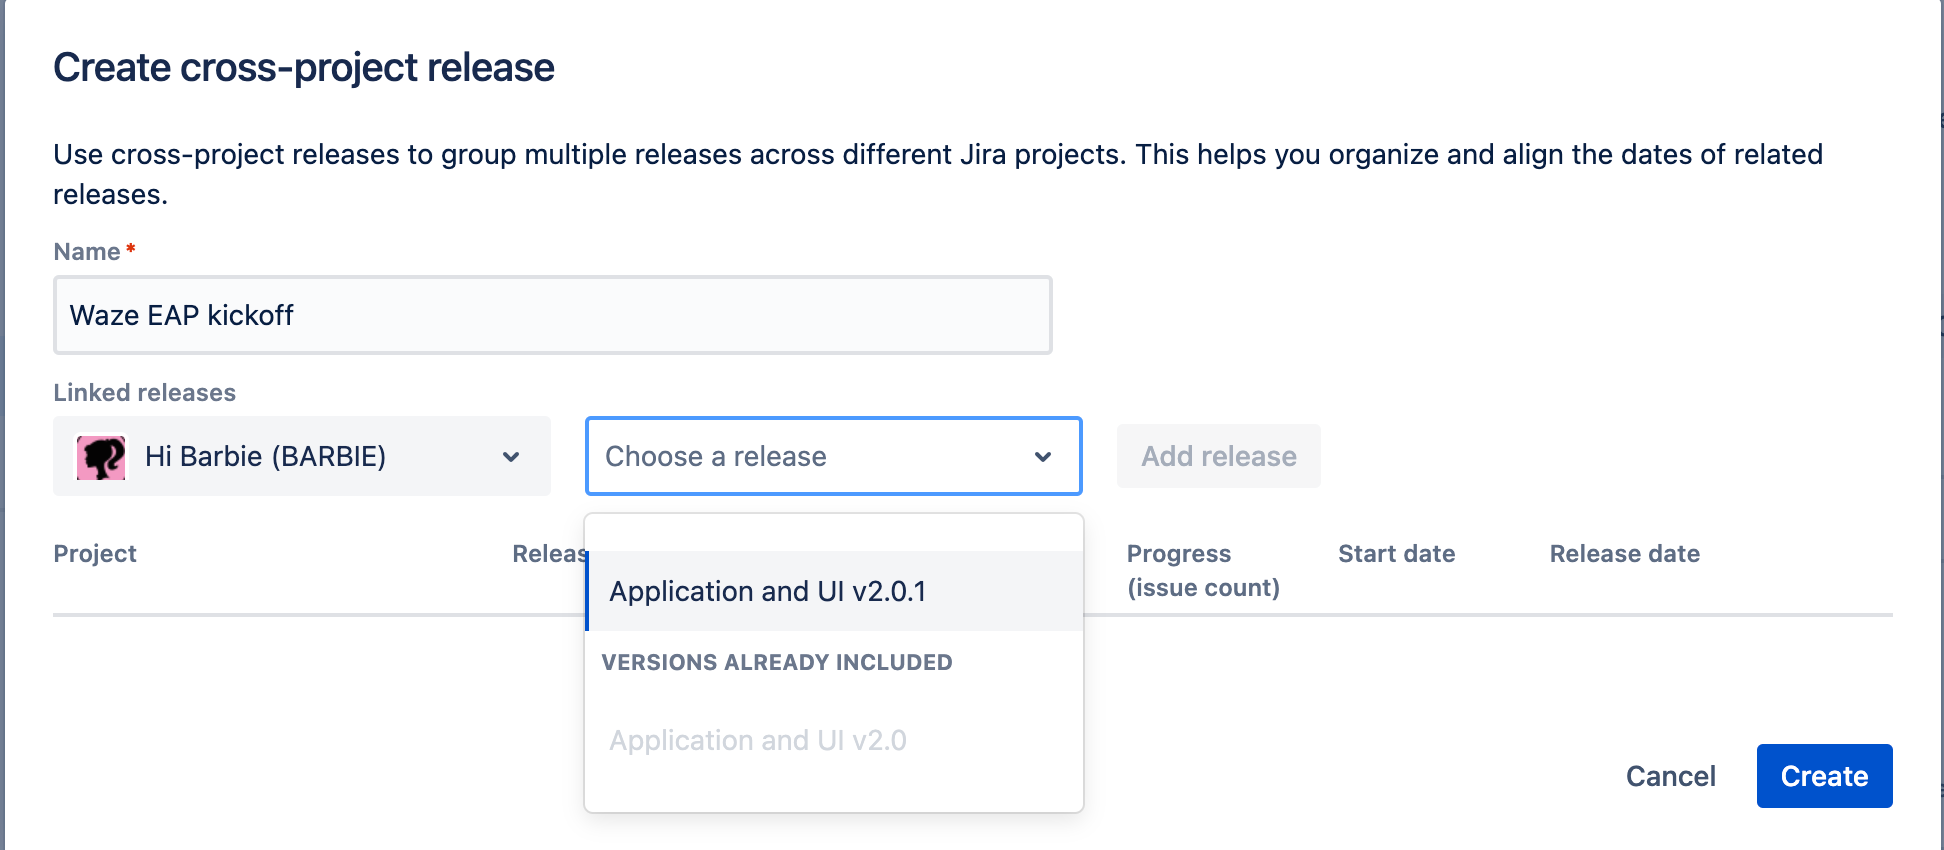
- Create cross-project releases to include all the epics and stories that will be delivered across teams. If the program shares a common project for all issues, you can skip this step.
- Select releases.
- Select create cross-project release.
- Cross-project releases group Jira fixed versions into a collection of versions that can be named something familiar to your organization, such as milestones:
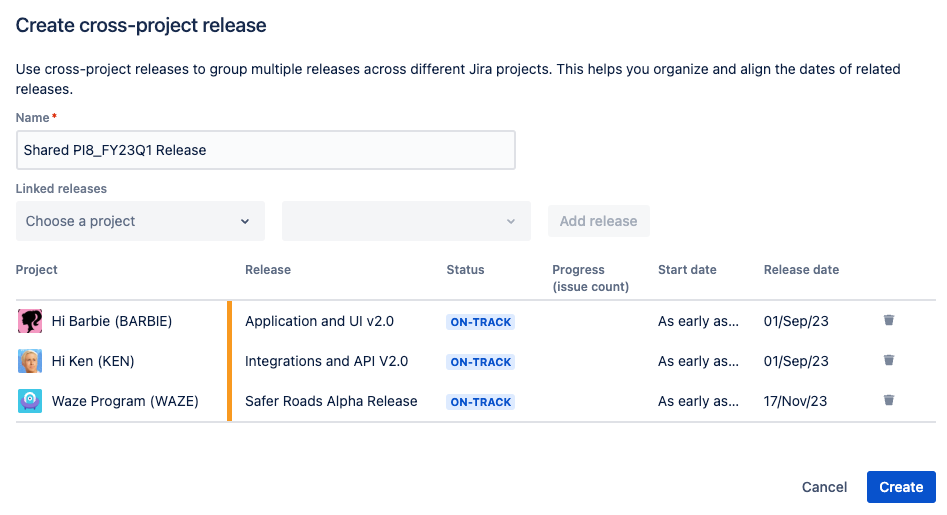
Note: Cross-project releases are only used in Advanced Roadmaps and can't be saved to your issues in Jira.
- In this step, you will create standardized views to support different planning needs.
- Select timeline.
- High-level planning view.
- Create a new view and name it “High-hevel planning,” or a name appropriate for your organization.
- Select filters, for the hierarchy, select initiative to story.
- Select fields.
- Choose all the appropriate fields to display:
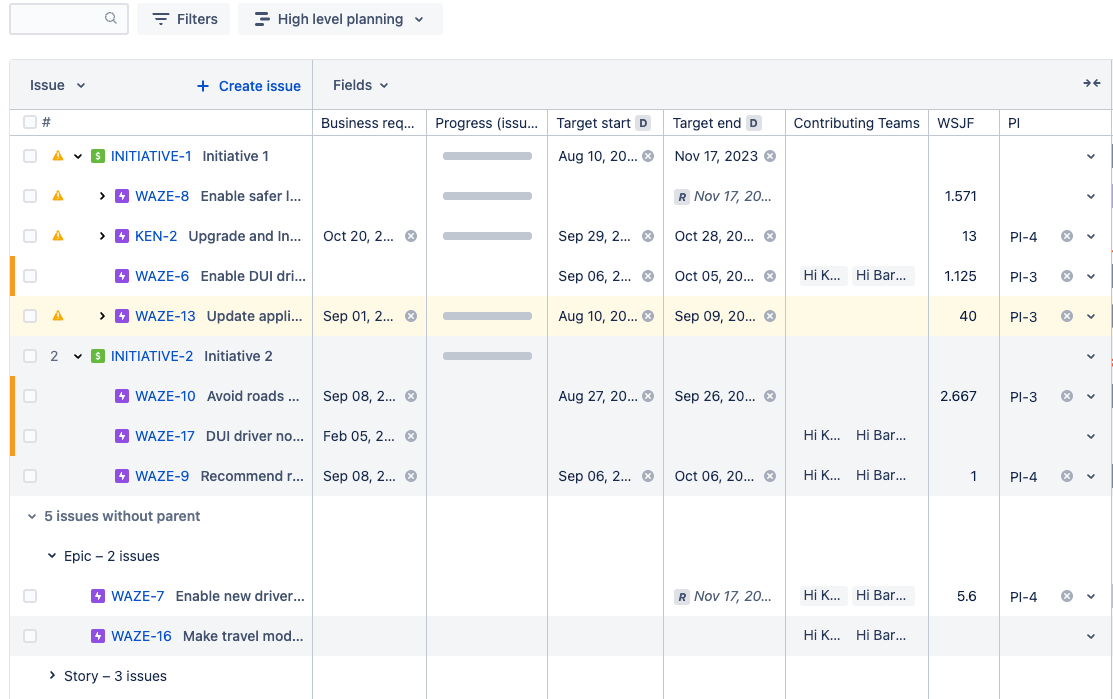
- Select save.
- WSJF view:
- Target Epics to PI - PI plan view
- Create a new view and name it “WSJF,” or a name appropriate for your organization.
- Select fields.
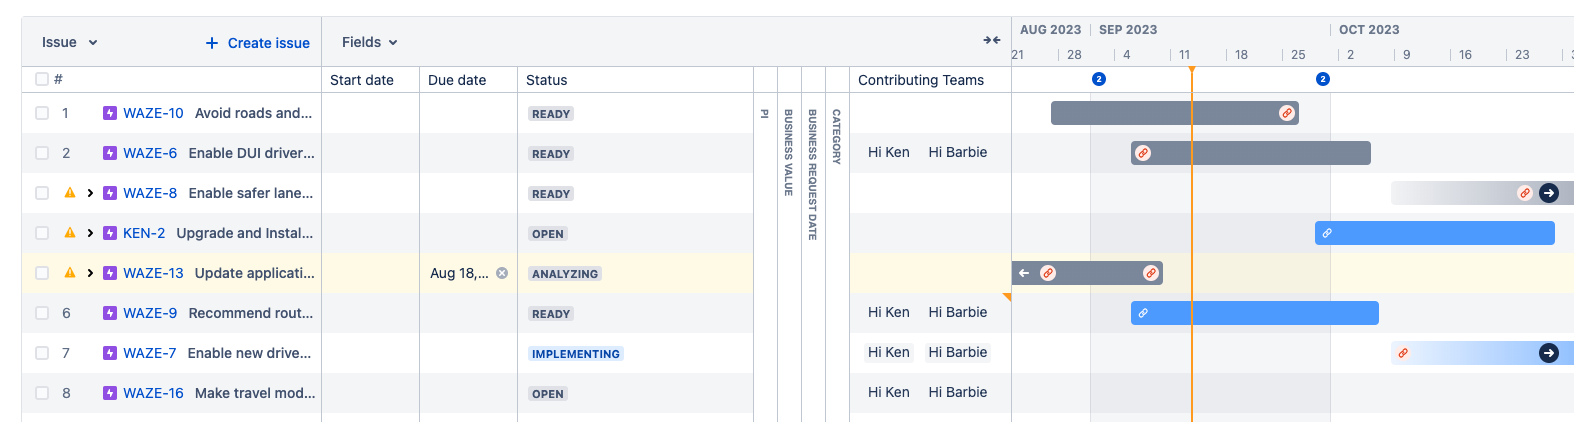
- Choose all the appropriate fields to display such as: status, PI business request contributing teams, t-shirt size:

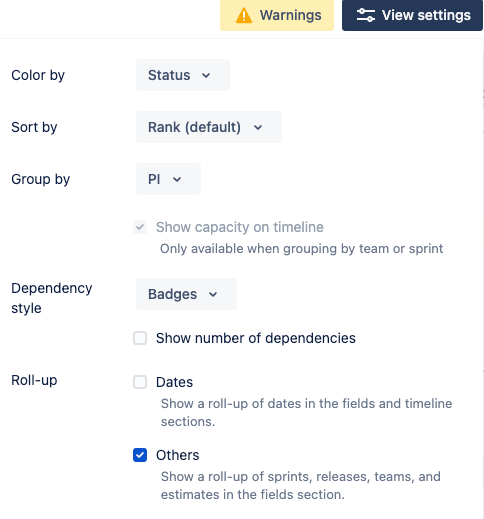
- Select view settings, sort by rank, group by PI:
- Select save.
- PI status reporting for leadership view.
- Create a new view and name it "PI status reporting for leadership,” or a name appropriate for your organization.
- Select filters, for the hierarchy, select initiative to story.
- Select fields
- Choose all the appropriate fields to display:
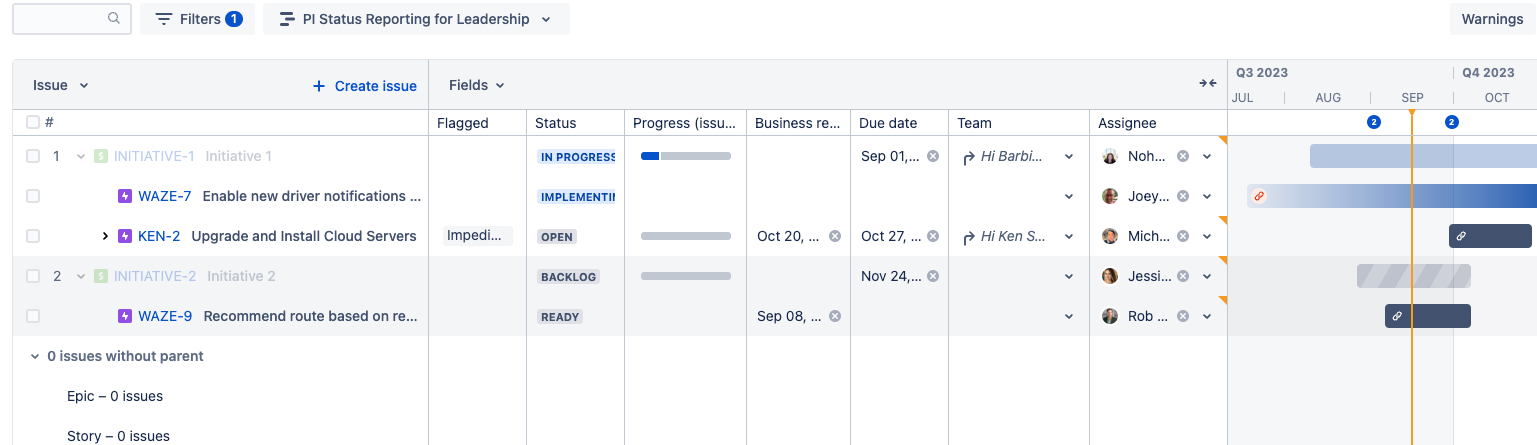
- Select save.
Note: You can share plans in Confluence with the Advanced Roadmaps for Jira macro.
- Issue sources
- Exclusion rules
- Releases
- Teams
- Saved views
Output
- Roadmap view of the PI plan
References
Previous step:
Was this content helpful?
Connect, share, or get additional help
Atlassian Community